One of my favorite things about the rave scene is how creative people get with their outfits! So many artists have strong brands and identities, which makes it really easy to create themed outfits, accessories, and trinkets. My first crochet rave project was a pattern from smolcottoncreations! I loved it and wanted to make more, but I wasn’t sure what I could make that I would feel comfortable wearing anywhere, because y’know, raves are not always gonna be in the warm outdoors!
I love hats, and always used a baseball cap to cover up my hair when it’s getting a little close to the next hair wash day or when I’m working out. Bucket hats on the other hand though- I’ve never been able to appreciate them because every bucket hat I’ve tried were the sturdy cotton types that never fit over my gigantic head. It made me sad every time it happened because they looked so cute on everyone else!
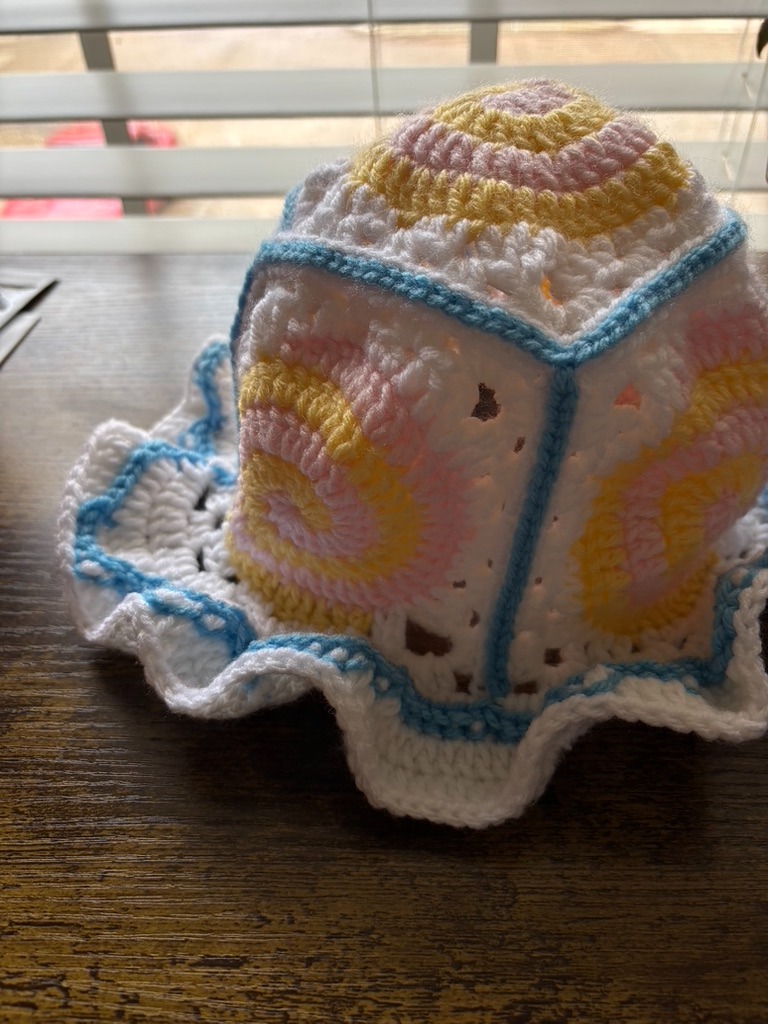
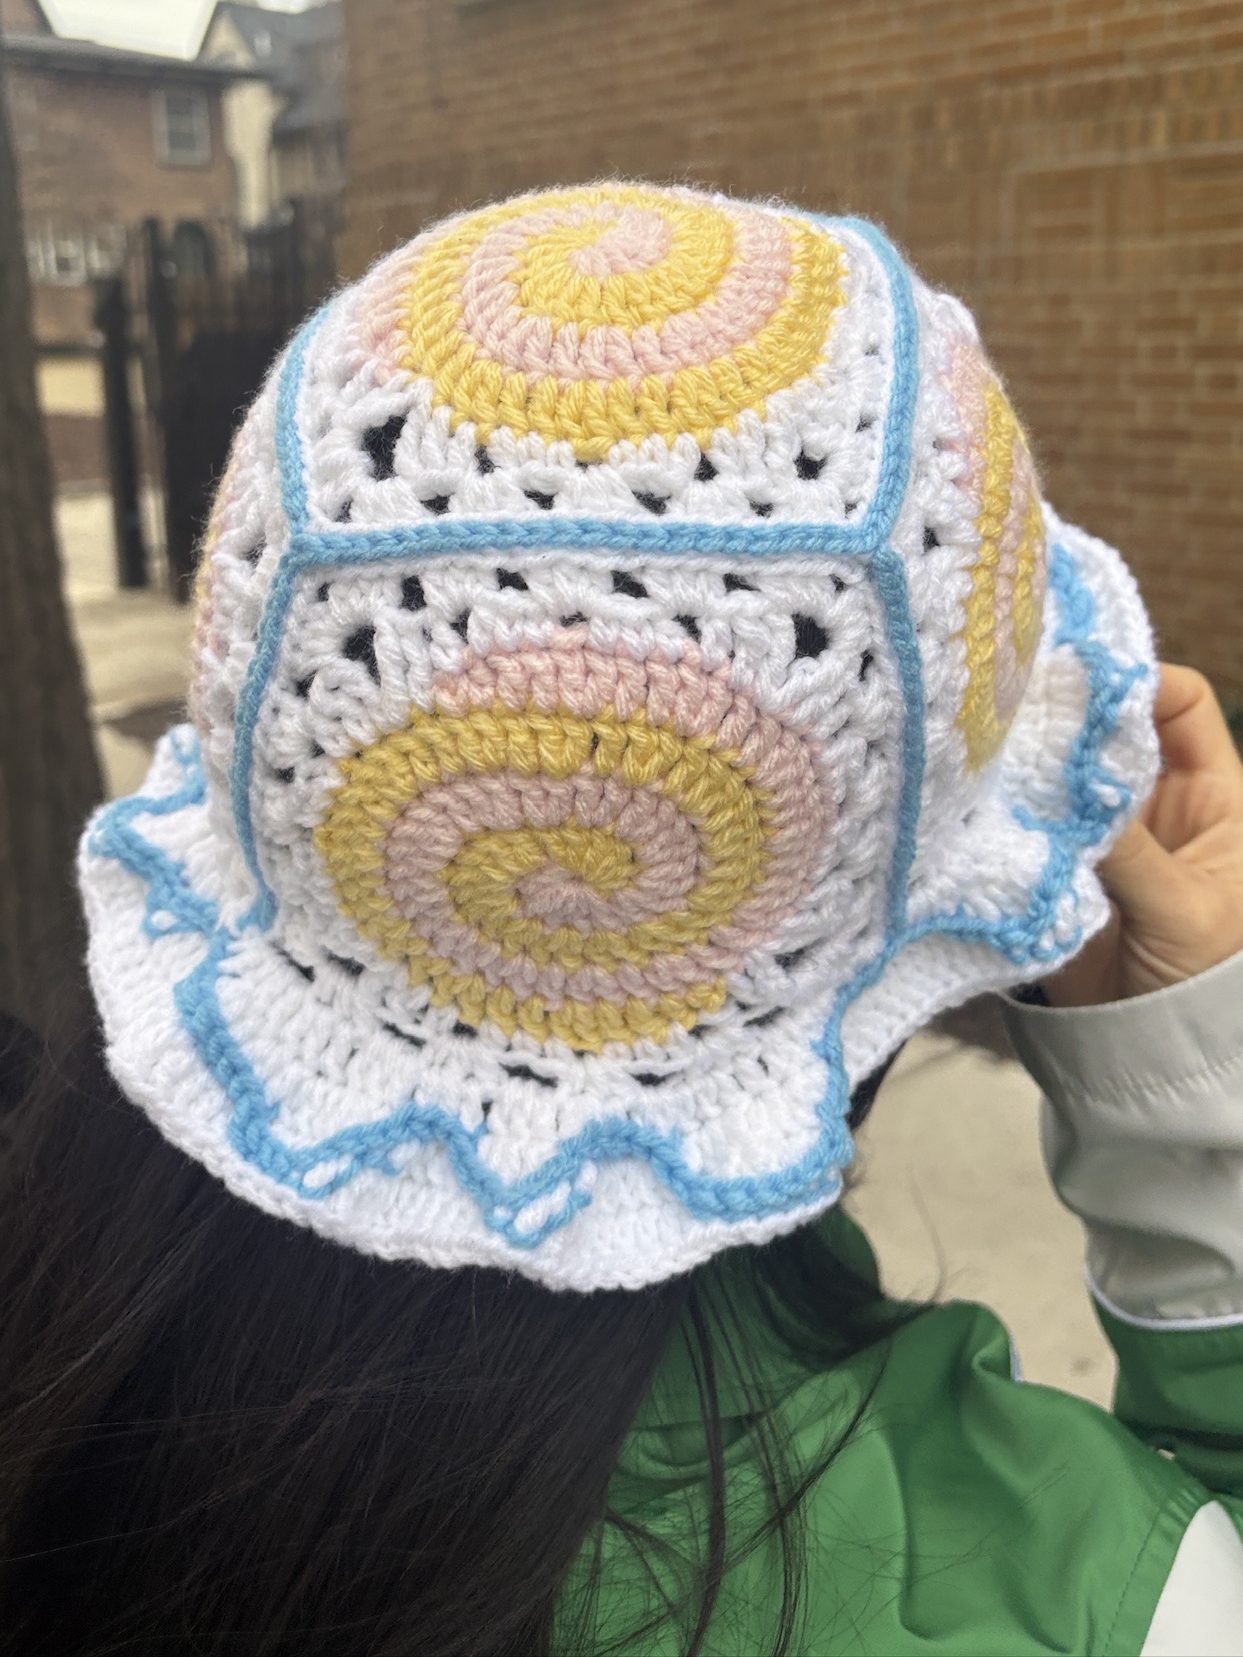
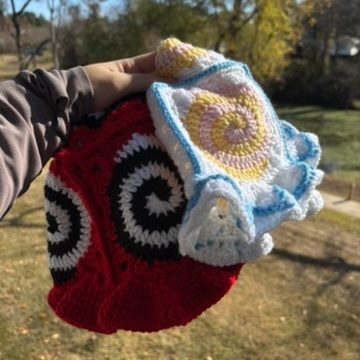
At another festival, I saw a crochet bucket hat that were simply made of granny squares with a little ruffled brim! I tried it on and I just could not believe how comfortable and cute it was, and how secure it made my head feel! It also helped me stand out in the crowd since it was made with lots of cute and bright colors that were identifiable even in the dark. As a beginner crocheter at that time, I had a really narrow outlook on granny squares since all of the examples I’ve seen were just very… oddly uniform and perfect? And that’s just not me. I also always saw it for sweaters, blankets, maybe some bags, and they were cute but I was still looking for my creative style and I personally wasn’t feeling it yet!
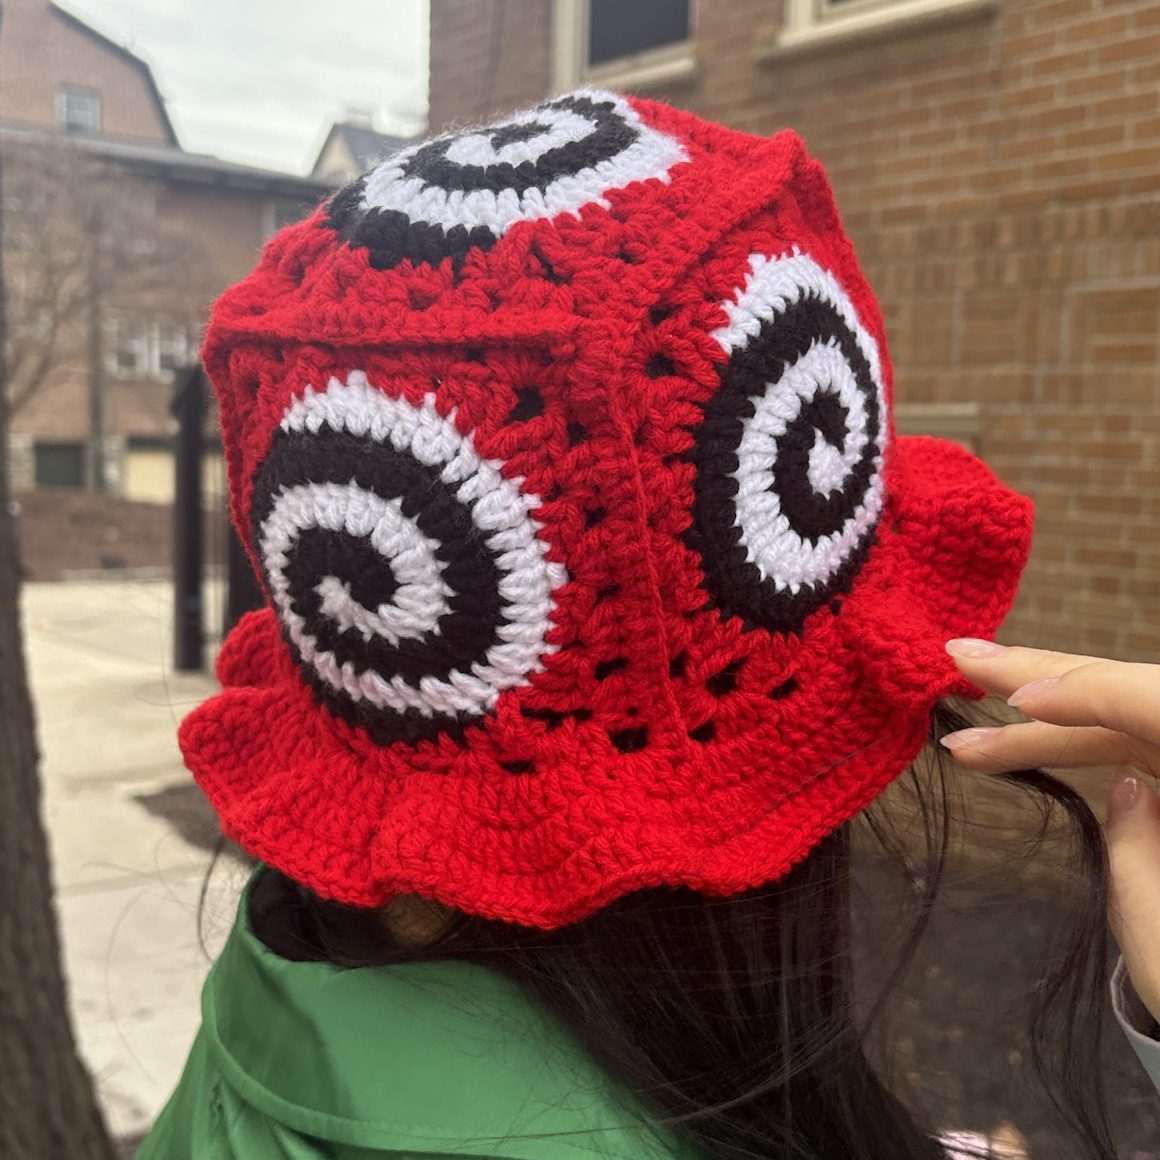
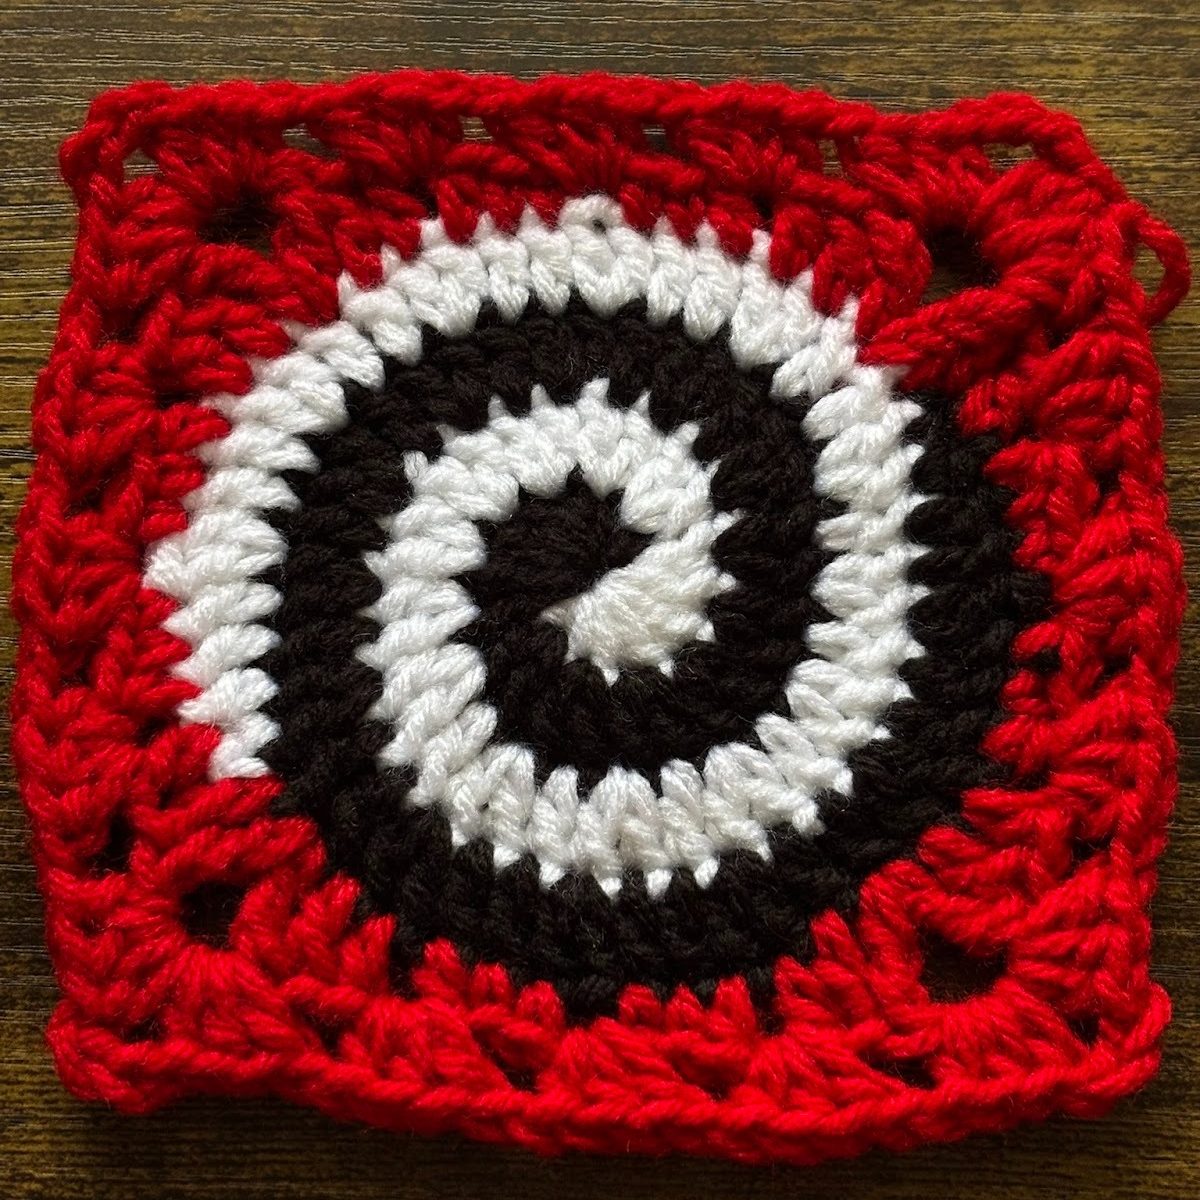
After some experimenting, I created my flower granny square pattern, but that existed only in my brain for a long time. I went to another Rezz show in Colorado and just loved the strong imagery she has. I thought to myself, couldn’t I just make my flower a spiral instead? It was honestly a lot more simple than I expected. It took me a little trial and error to figure out how to start the first row of the border, but I was so happy with the result!
This pattern starts with creating the spiral, creating the border, attaching the squares, and finally creating the brim. I offer two methods to attach the squares- either by using a sc to hold them together which creates a seam, or using a mattress stitch to create a flat seam.
Thank you for checking out my pattern! Your support helps me make more patterns like this, and any feedback or suggestions are appreciated so we can make new cool things together! If you have any questions at all about this pattern, please don’t hesitate to reach out to me!
This pattern is written in US, right handed terms.
- Recommended materials
- Making the spiral
- Making the square
- Joining the squares
- Option 1: sc across to join
- Option 2: slip stitch join
- Creating the brim
Recommended materials
- Worsted weight (4) yarn. I used three colors
- Crochet hook 3.0-4.0mm, depending on how large you want your squares to be
- Stitch markers (optional, but helpful)
- Scissors
Abbreviations
St = stitch
Ch = chain
Slst = slip stitch
Sc = single crochet
Dc = double crochet
Tr = treble crochet
Mr = magic ring
Hdc = half double crochet
Inc = increase
FO = finish off, using whatever methods suit you best
Pm = place (stitch) marker
C1 = color 1
C2 = color 2
Other notes:
To attach yarn, insert the hook through the desired stitch with nothing on it. With your working yarn, create a slip knot, attach on the hook, and pull through the stitch. Ch 1 to secure.
I am the only crocheter I know, so I didn’t get to have anyone test this pattern! If you have any feedback or find any mistakes, please let me know and I will be so grateful!
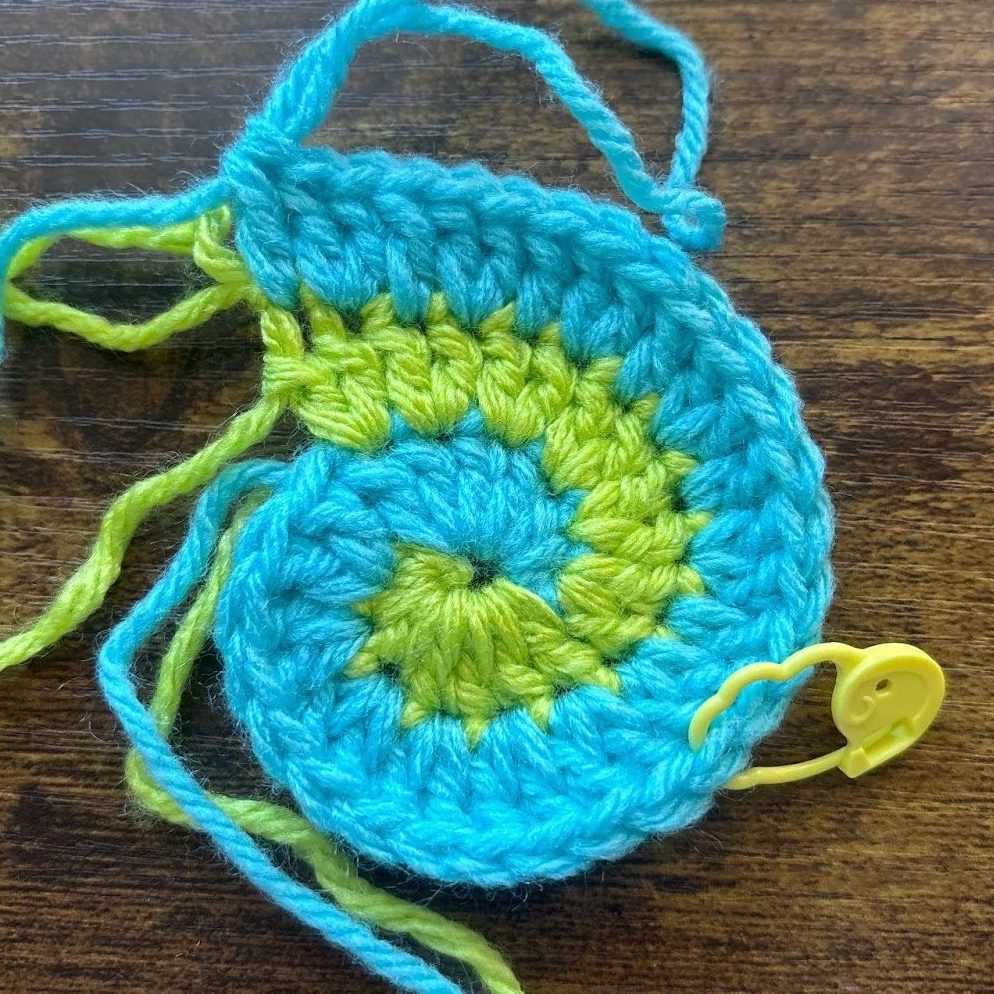
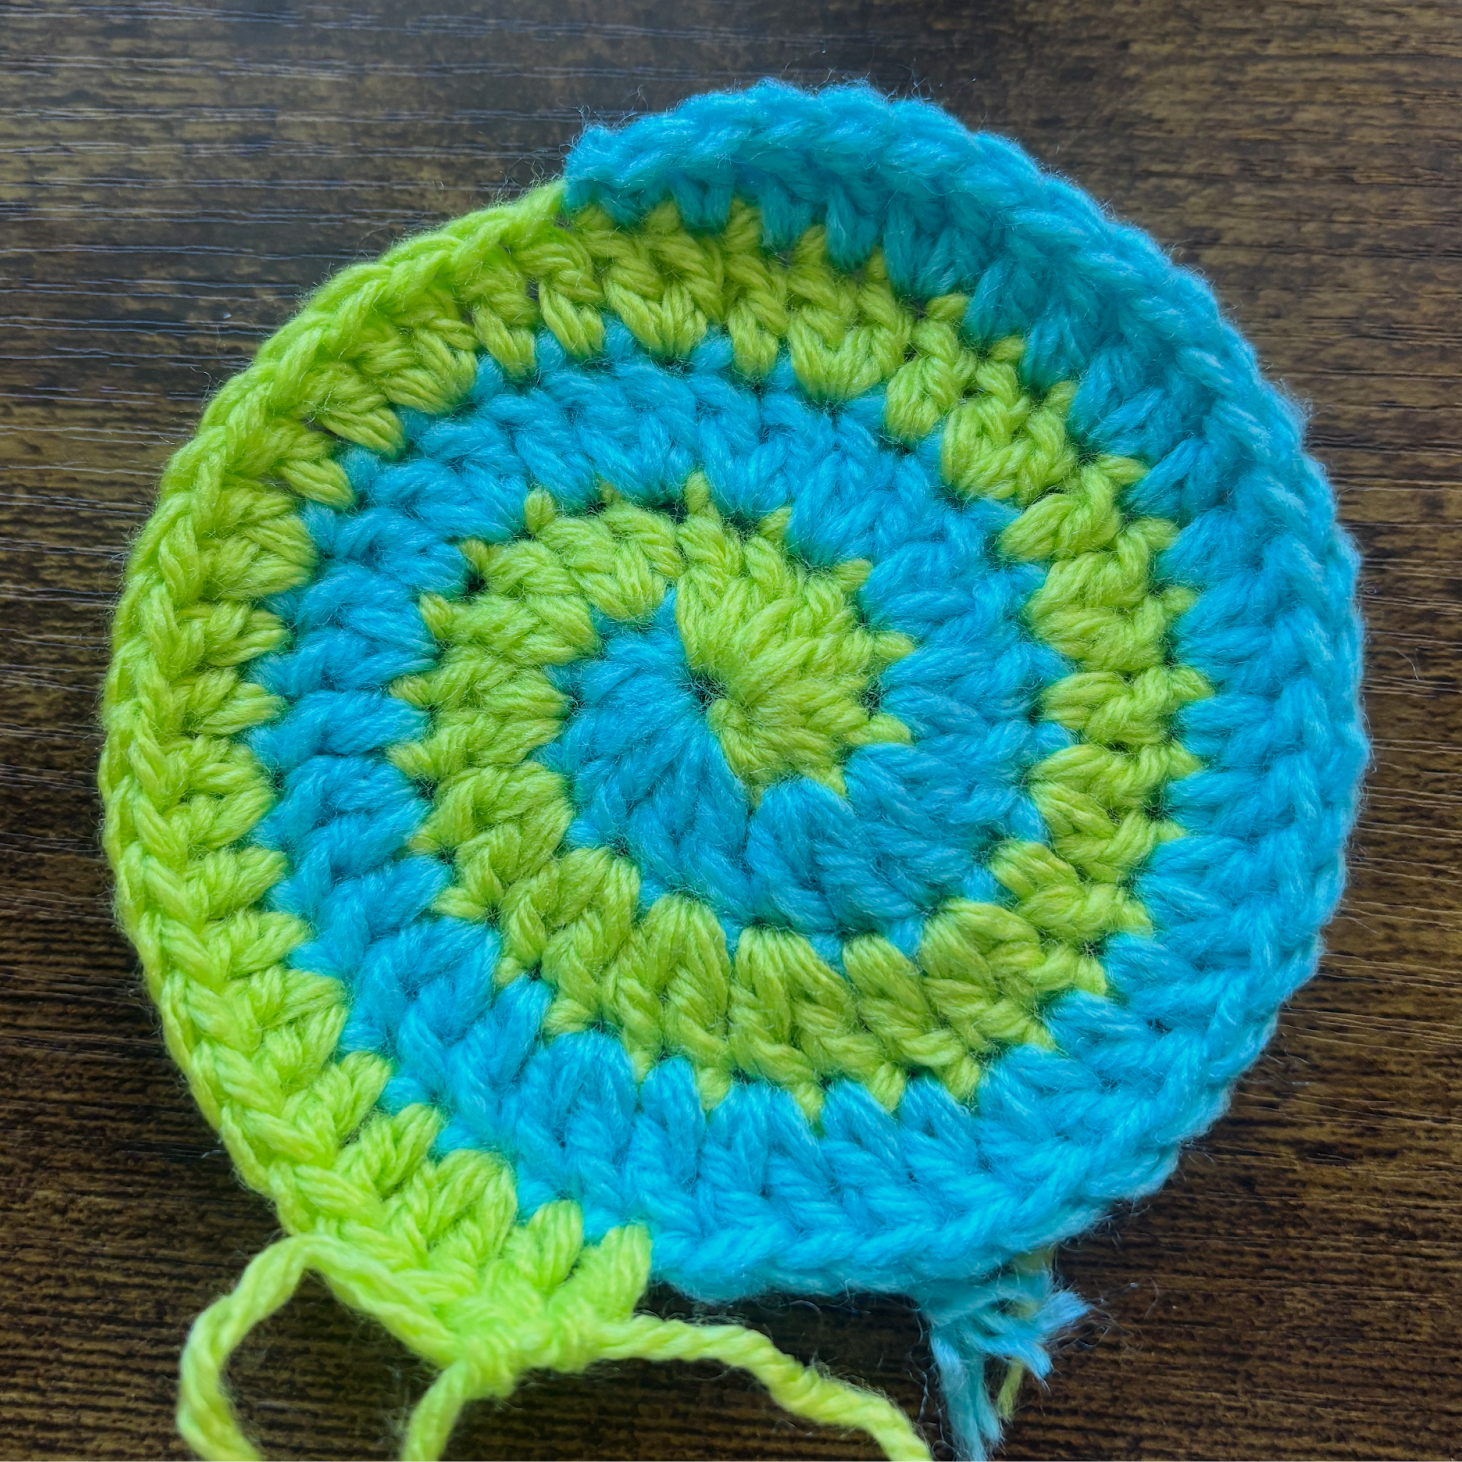
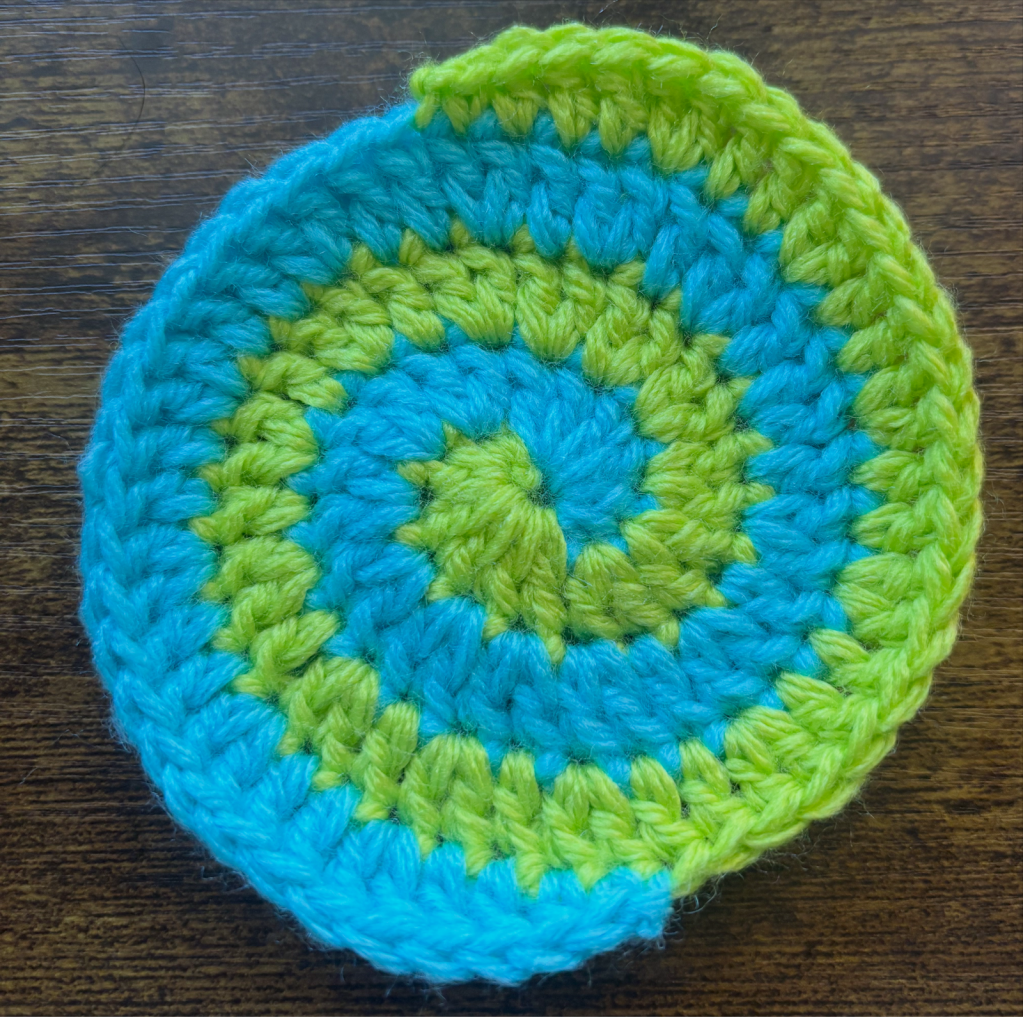
Gauge: finished spiral should be 3.5×4 in. The spiral actually comes out a little oblong until it is worked into a square, and may take some shaping.
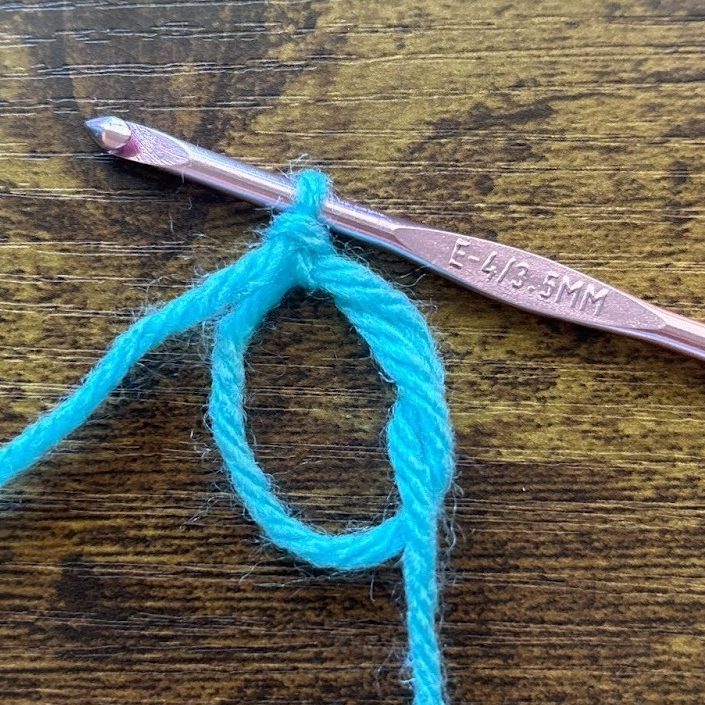
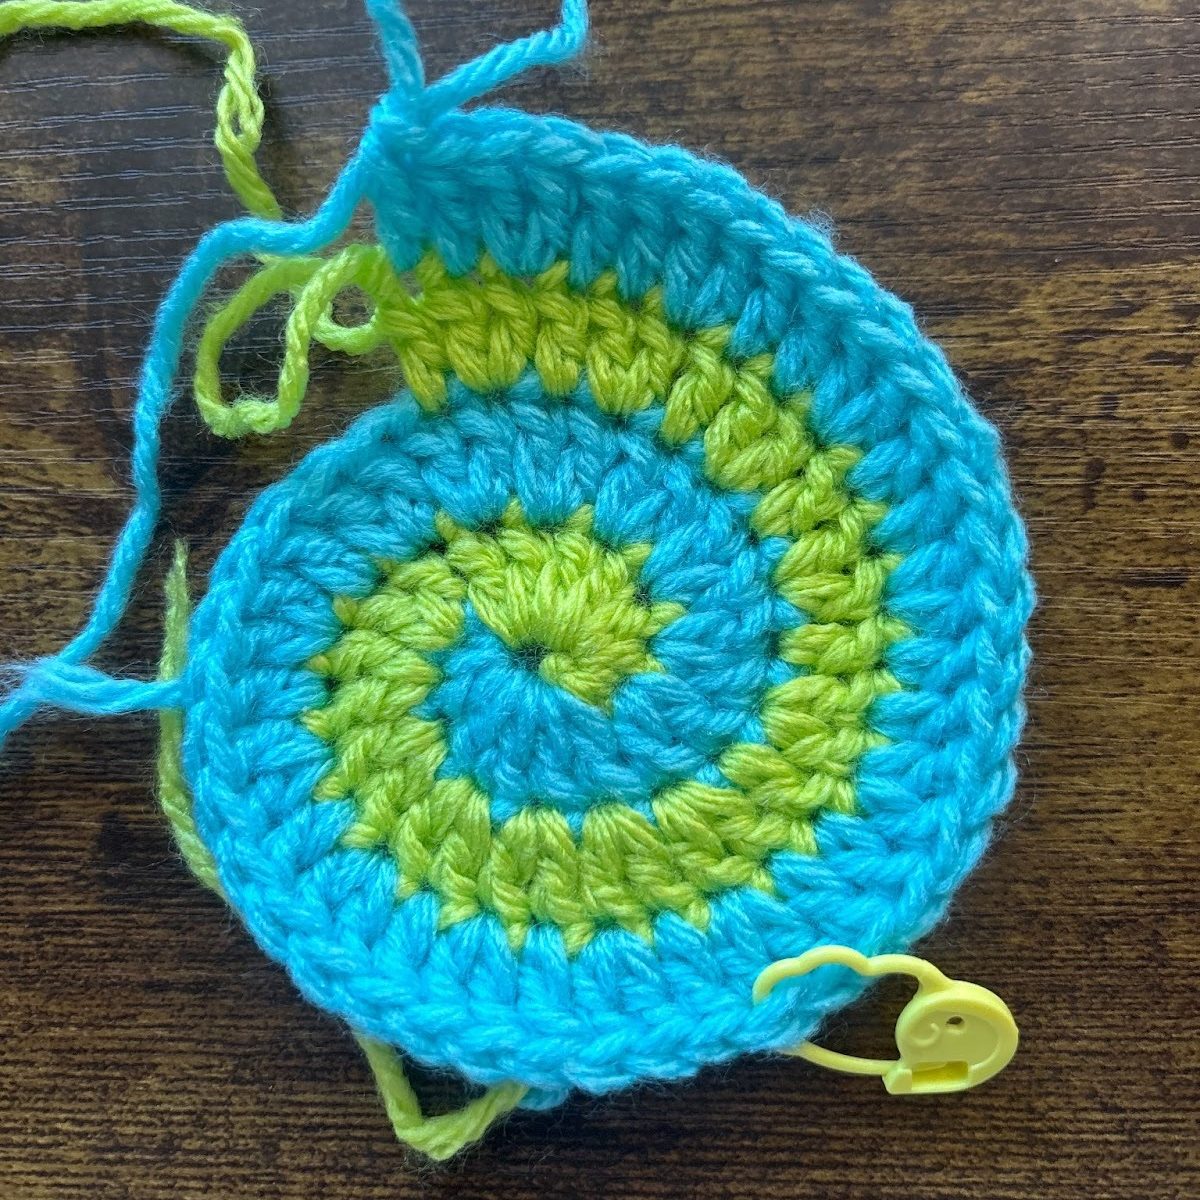
Making the spiral
Whatever yarn you use here will be color 1 (C1).
MR, ch1 to secure.
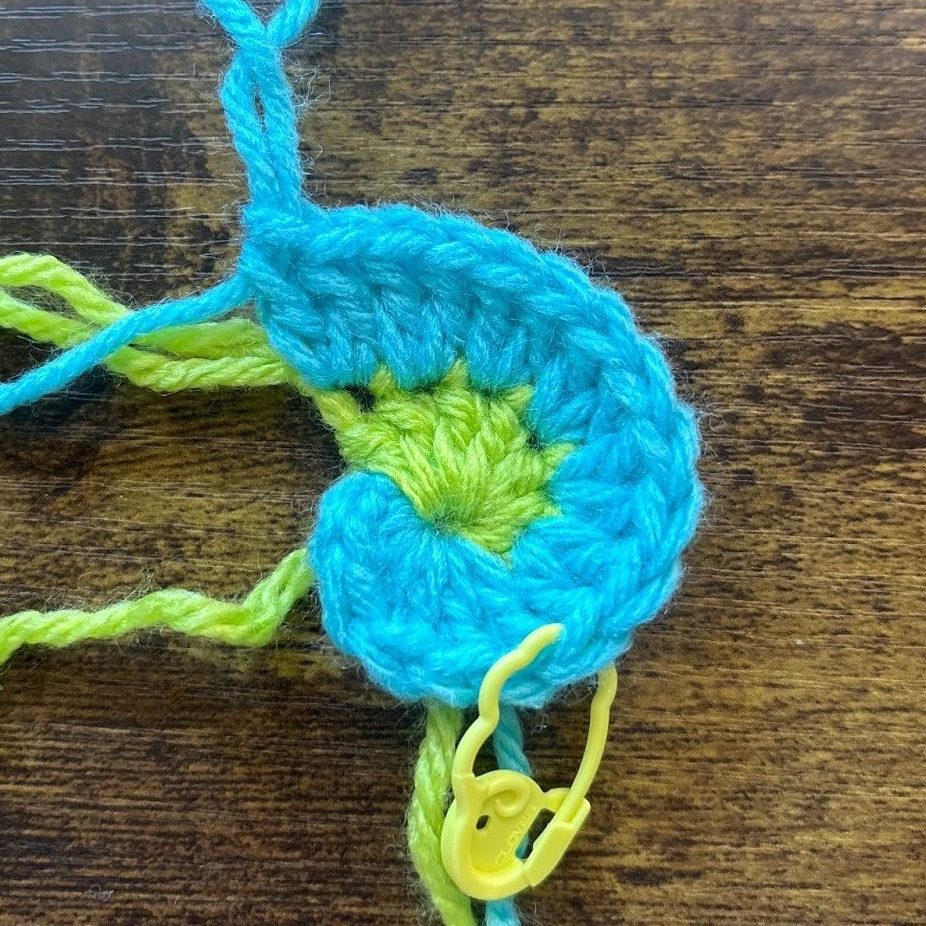
R1, C1: 1 sc, 1 hdc, 4 dc (6 st). Pull up the loop to return later
R1, C2: Slip knot, ch1 to secure to other side of white yarn. 1 sc, 1hdc, 4 dc (6 st, 12 st total). Pull up the loop to return later
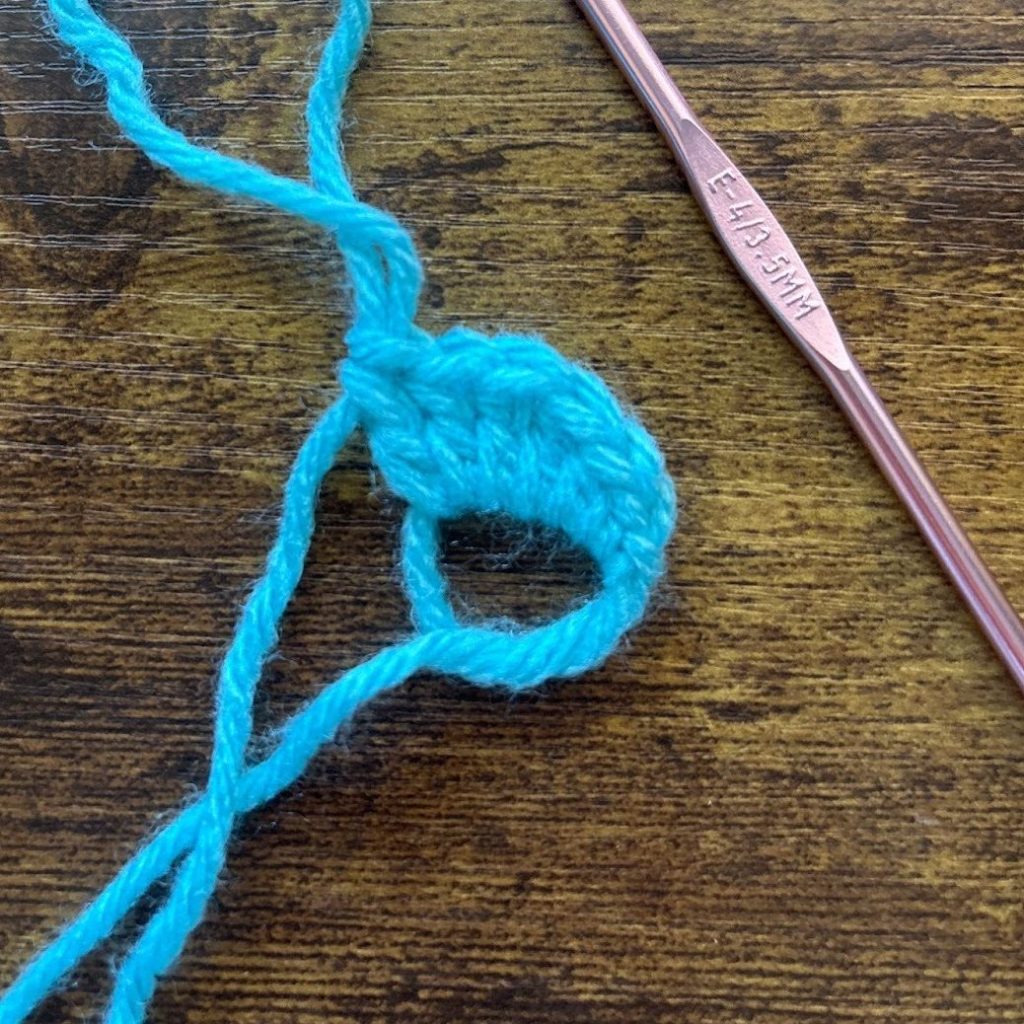
R2, C1: Dc Inc each st, pm in the first st of the first dc Inc (12 st)
R2, C2: Repeat (12 st, 24 st total)
At this point, I closed the ring tightly and FO.
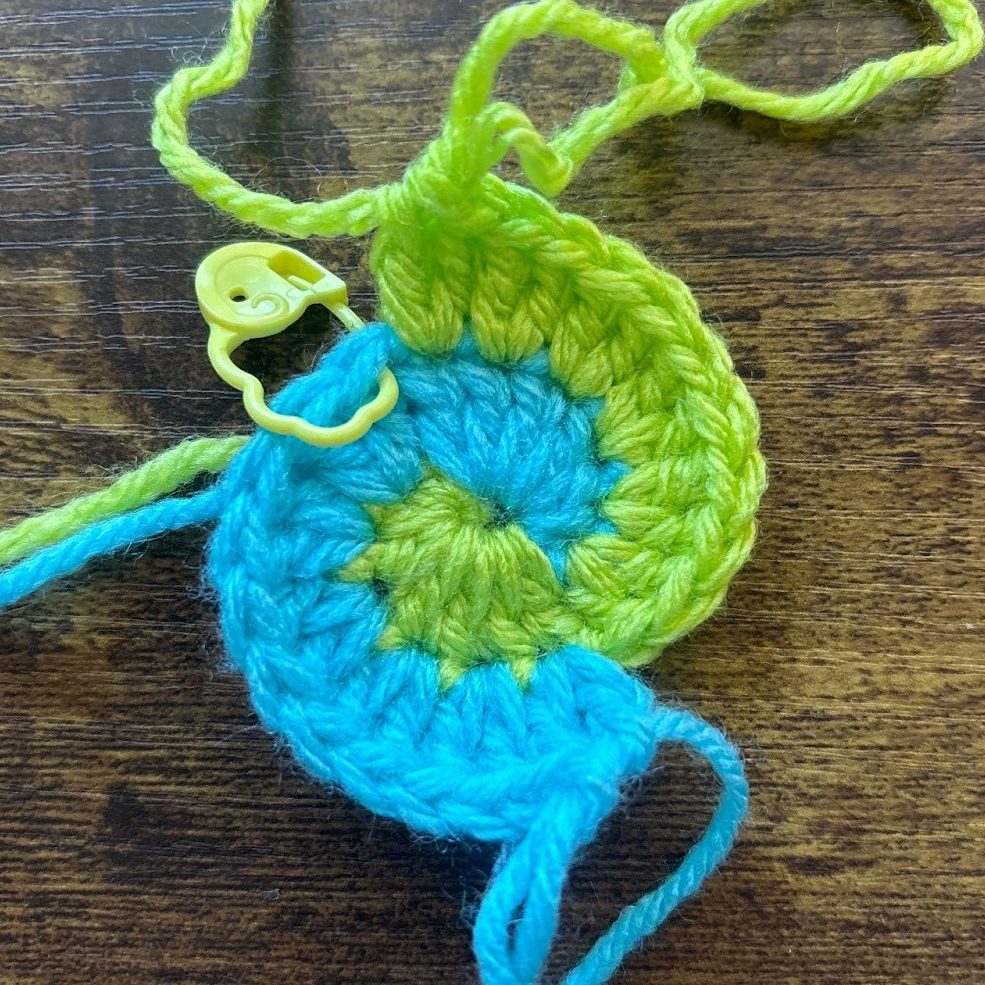
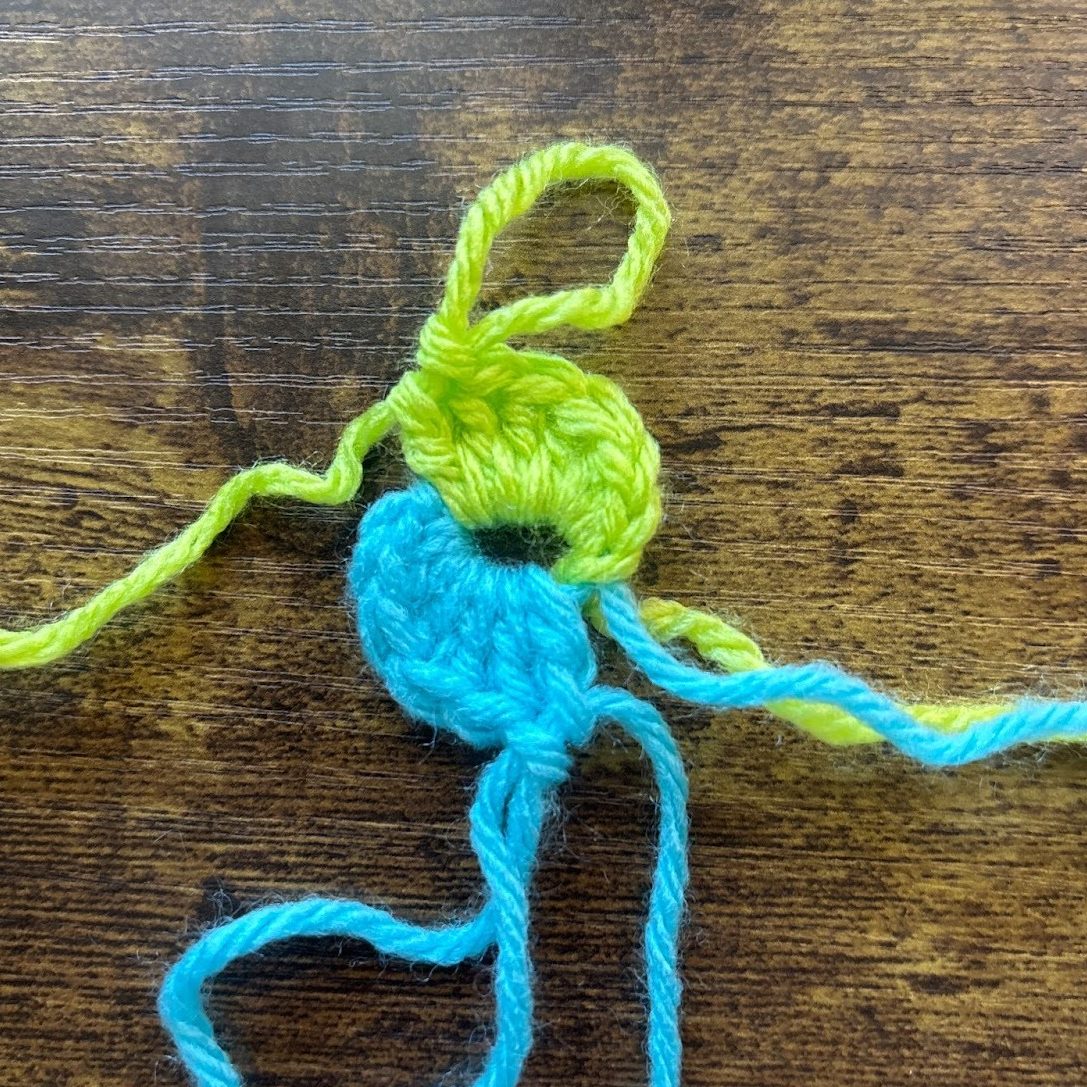
R3, C1: (Dc Inc, dc) to the end
R3, C2: Repeat
R4, C1: (Dc Inc, dc, dc) to the end
R4, C2: Repeat
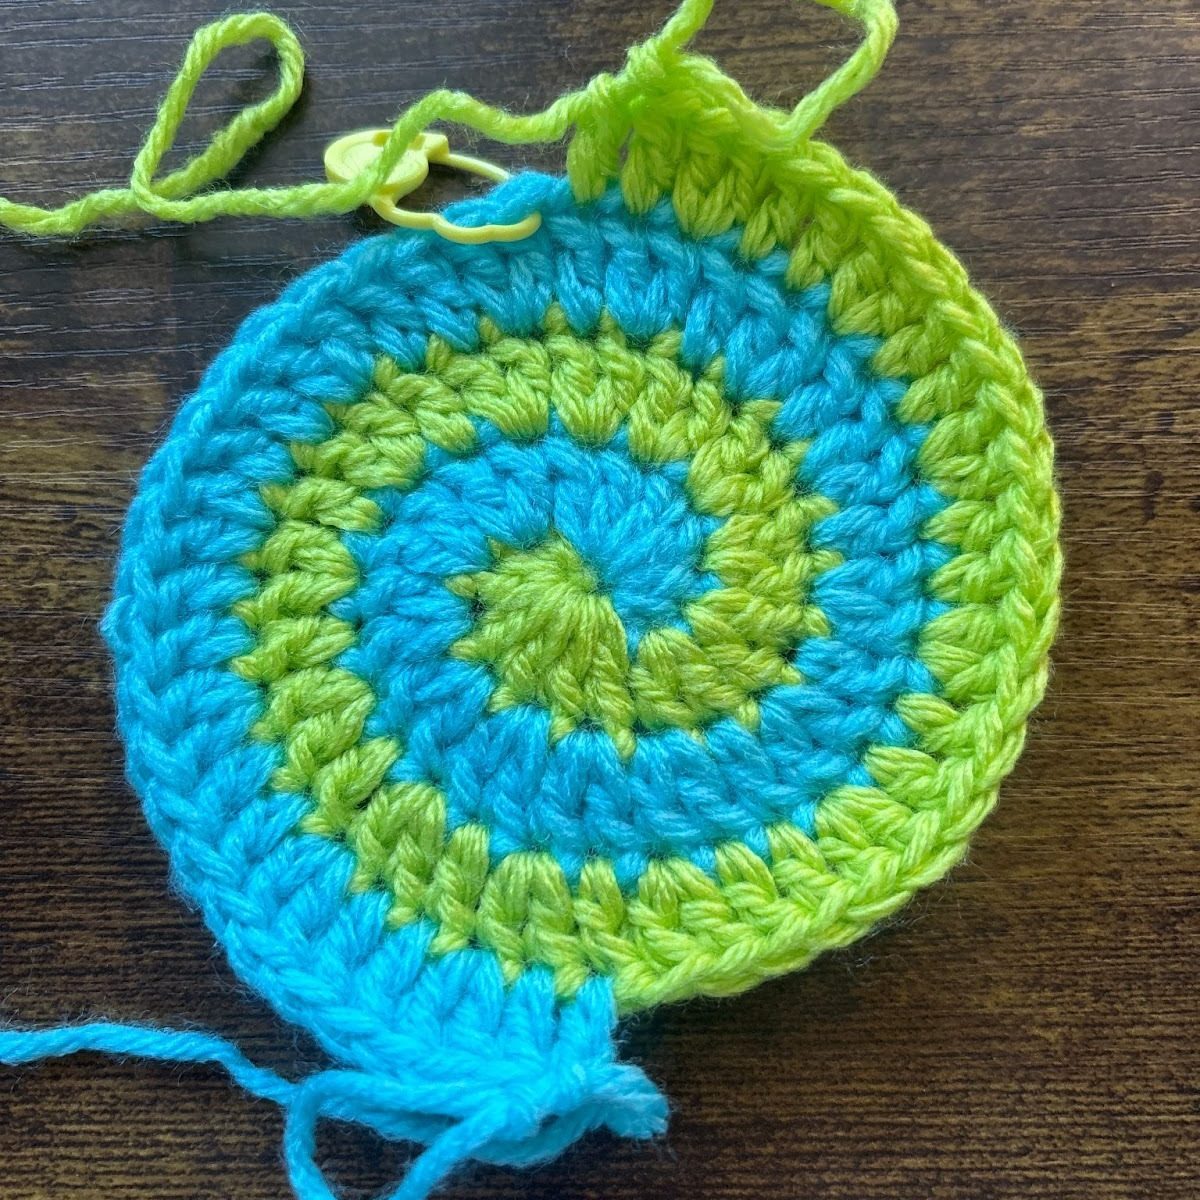
R5, C1: Hdc, sc, slst, fo
R5, C2: Repeat
Pt 2: granny sq with red yarn
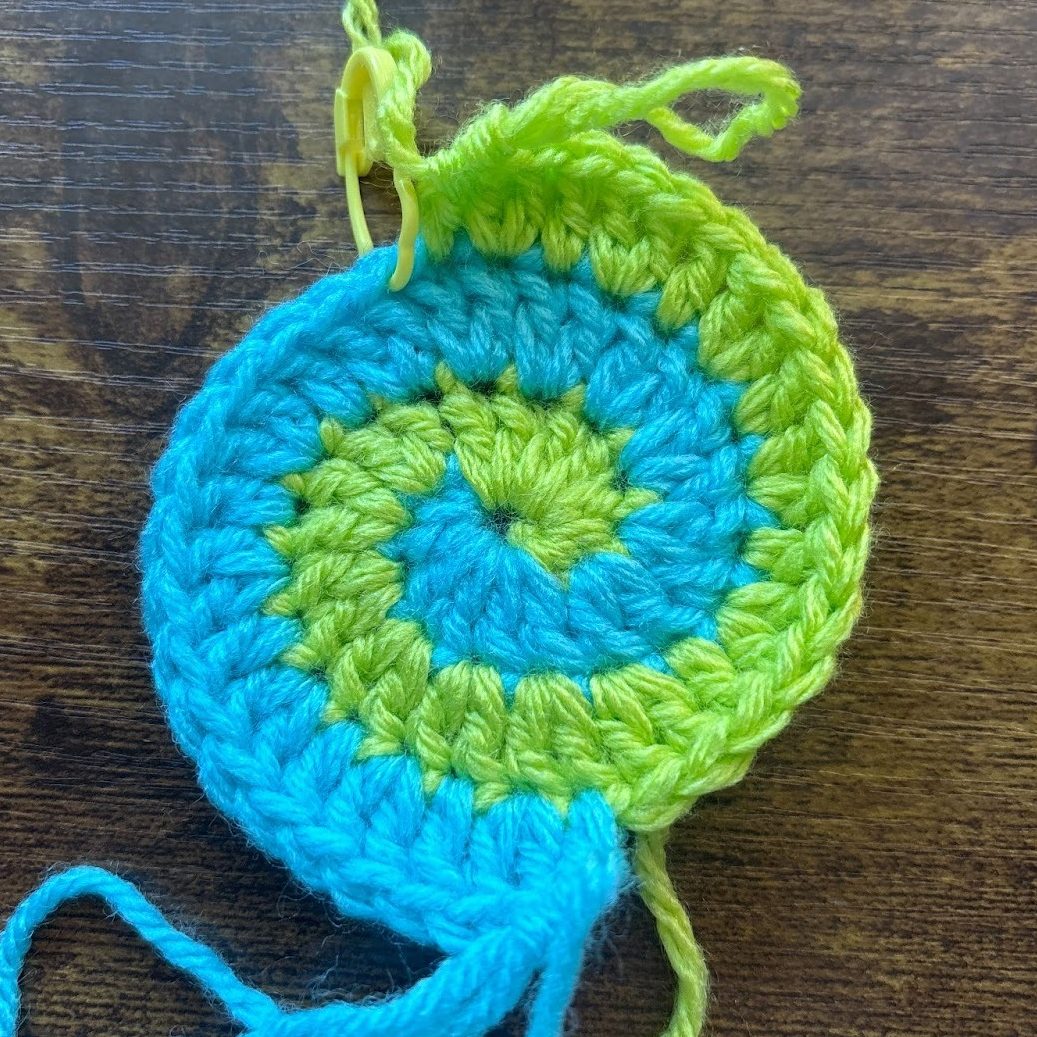
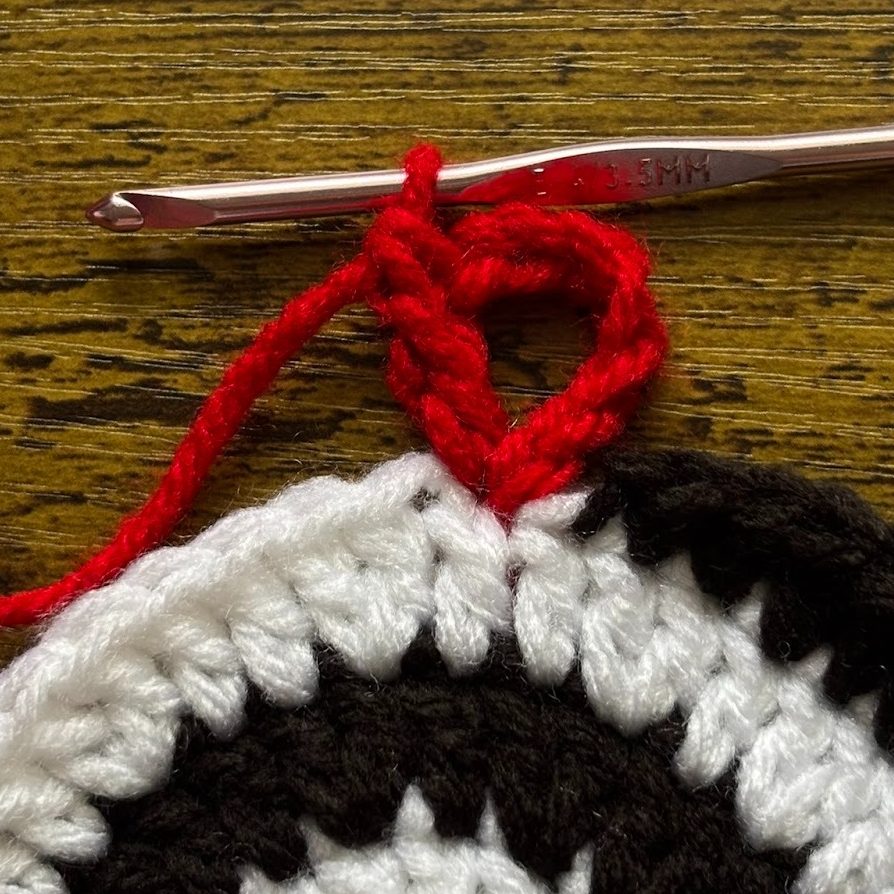
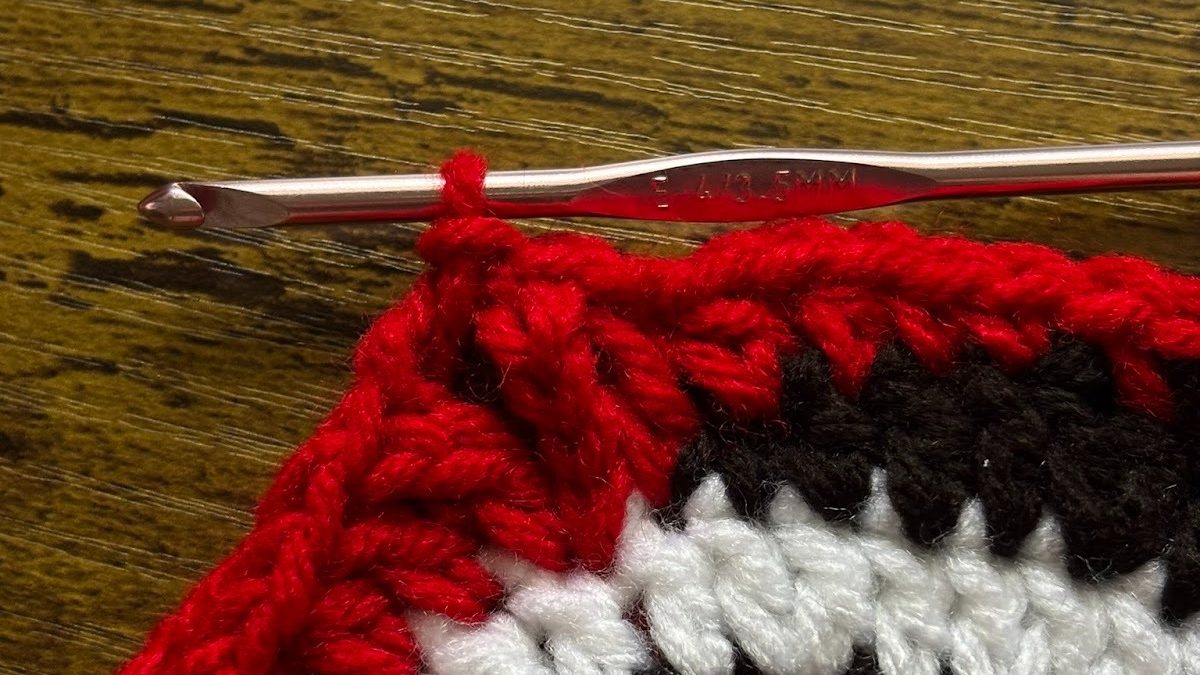
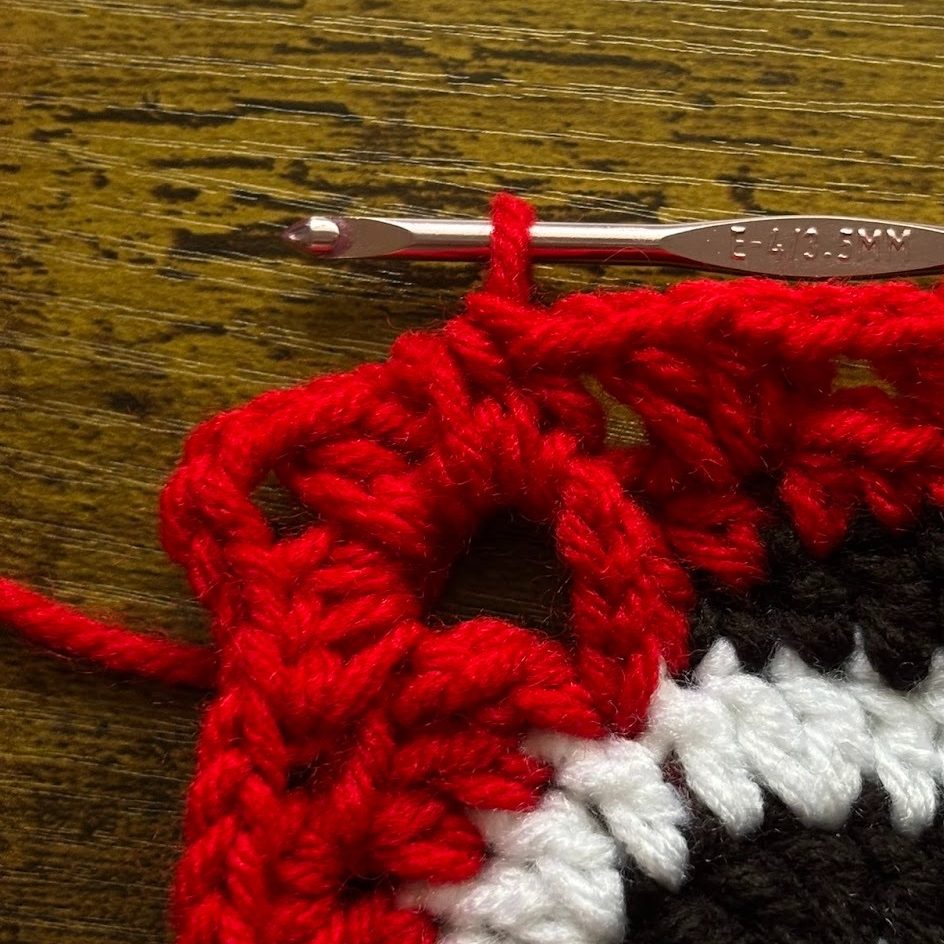
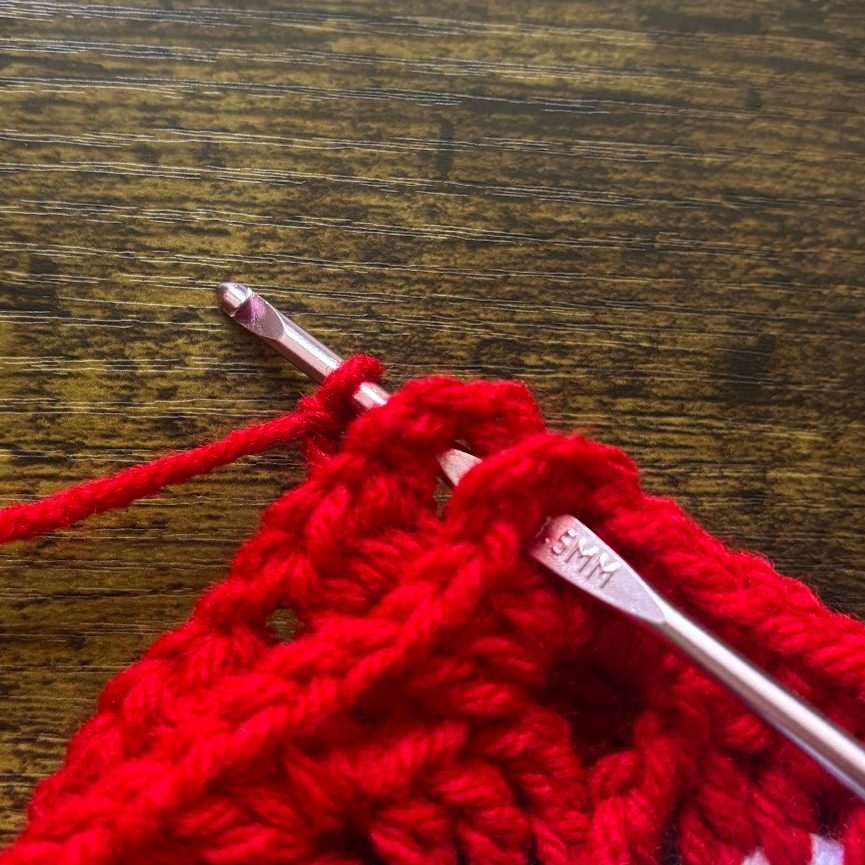
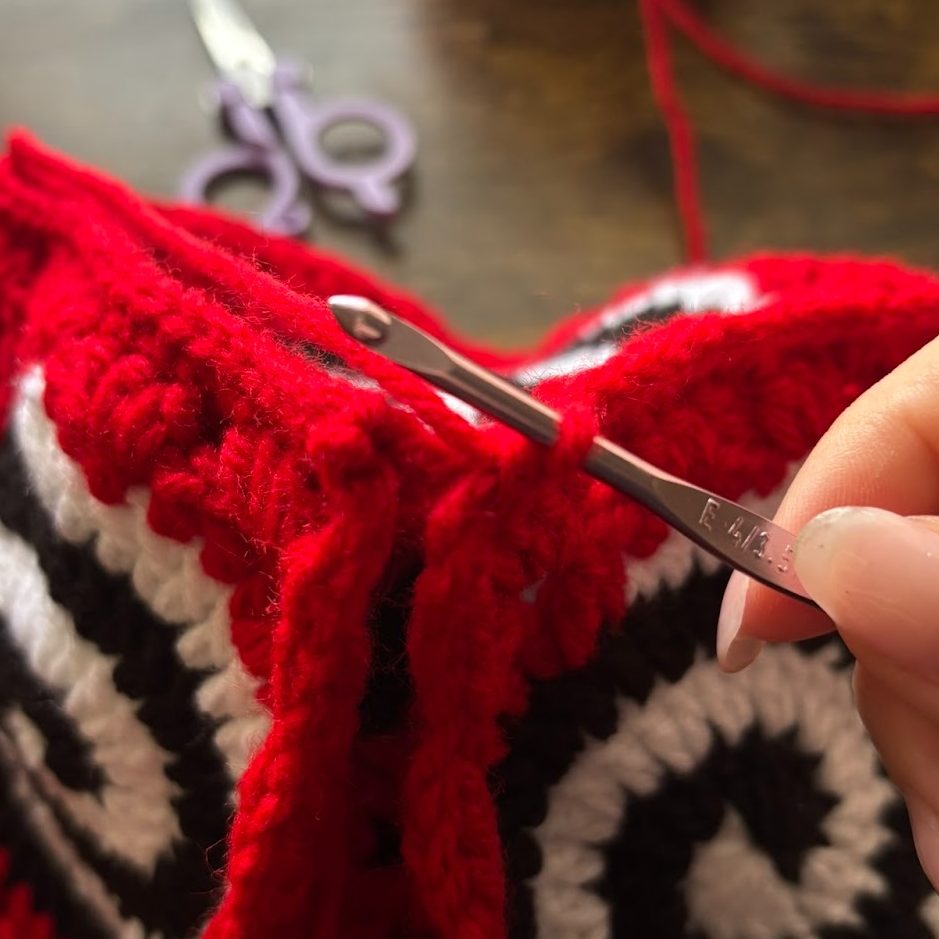
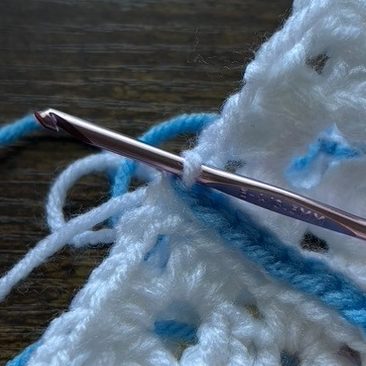
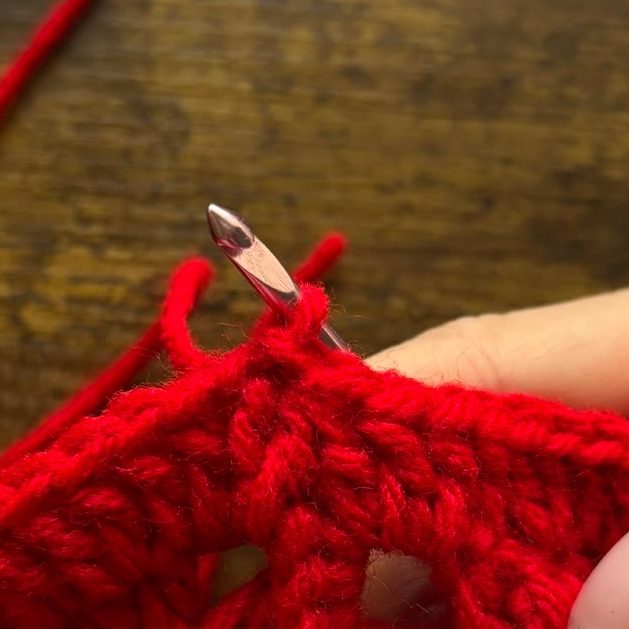
R1: Attach yarn wherever you’d like (ch1 to secure), but I did it at the st right after the slst.
Ch 6 (counts as tr + ch2). Tr in the same st.
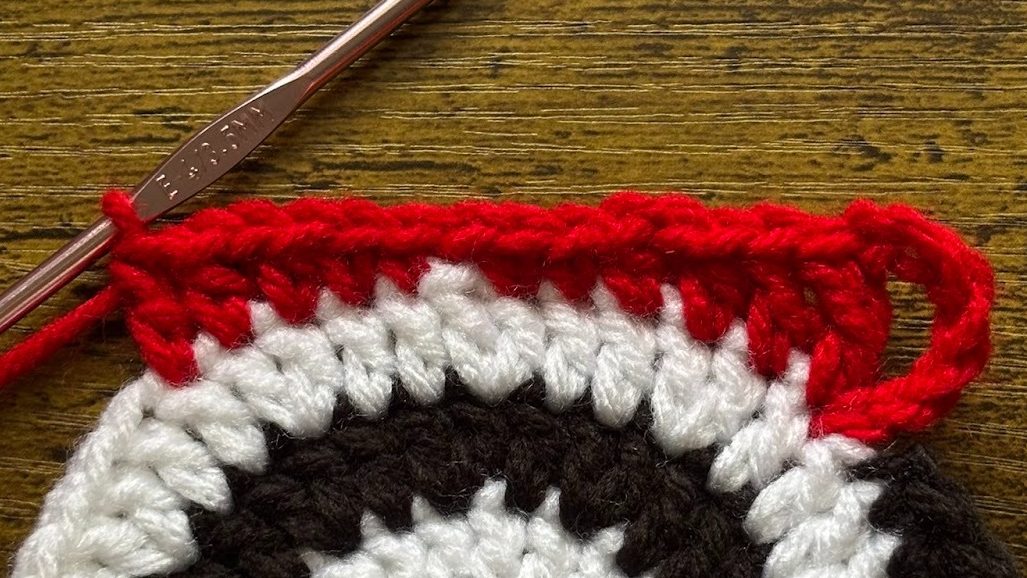
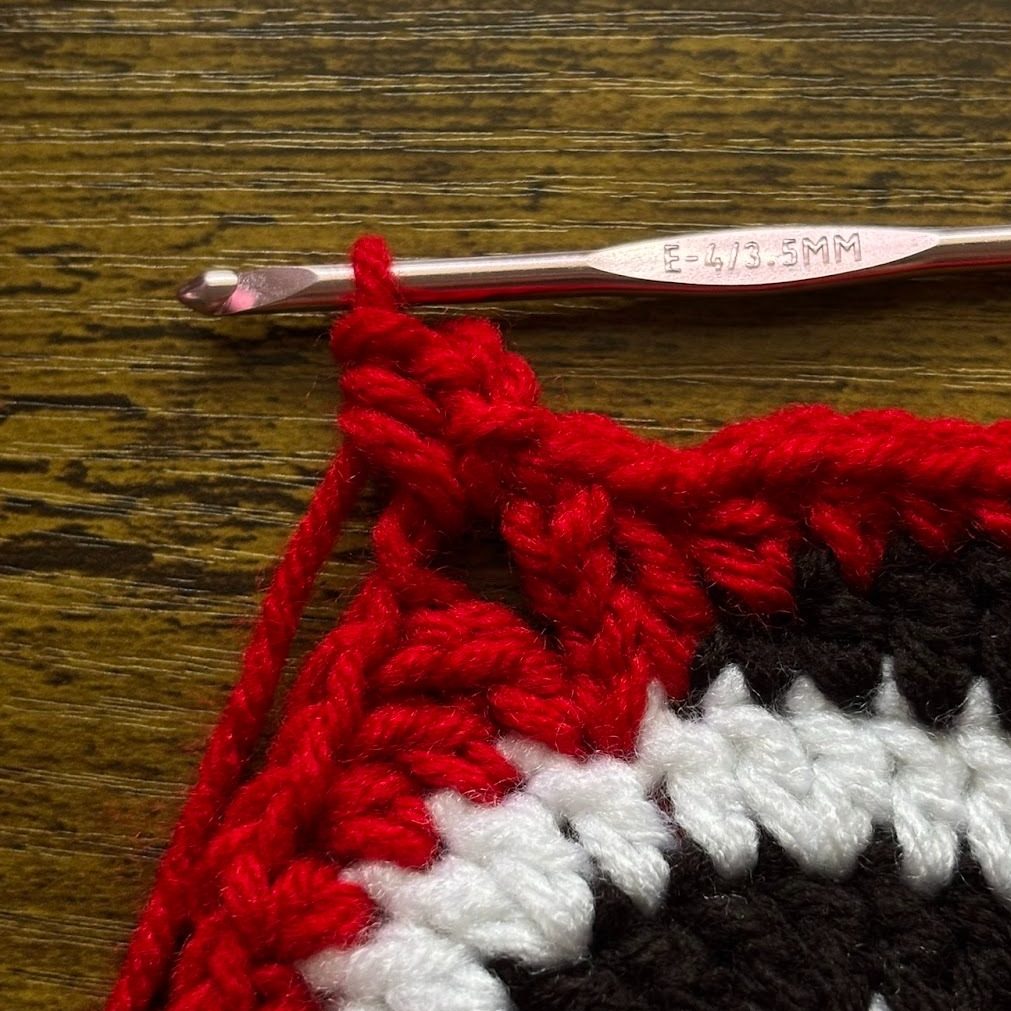
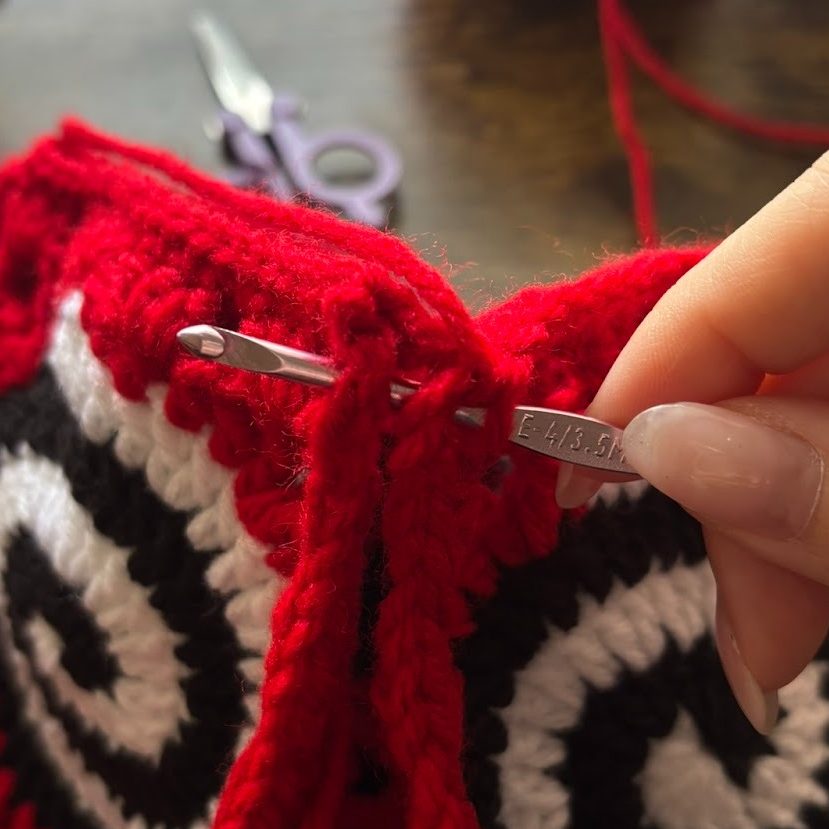
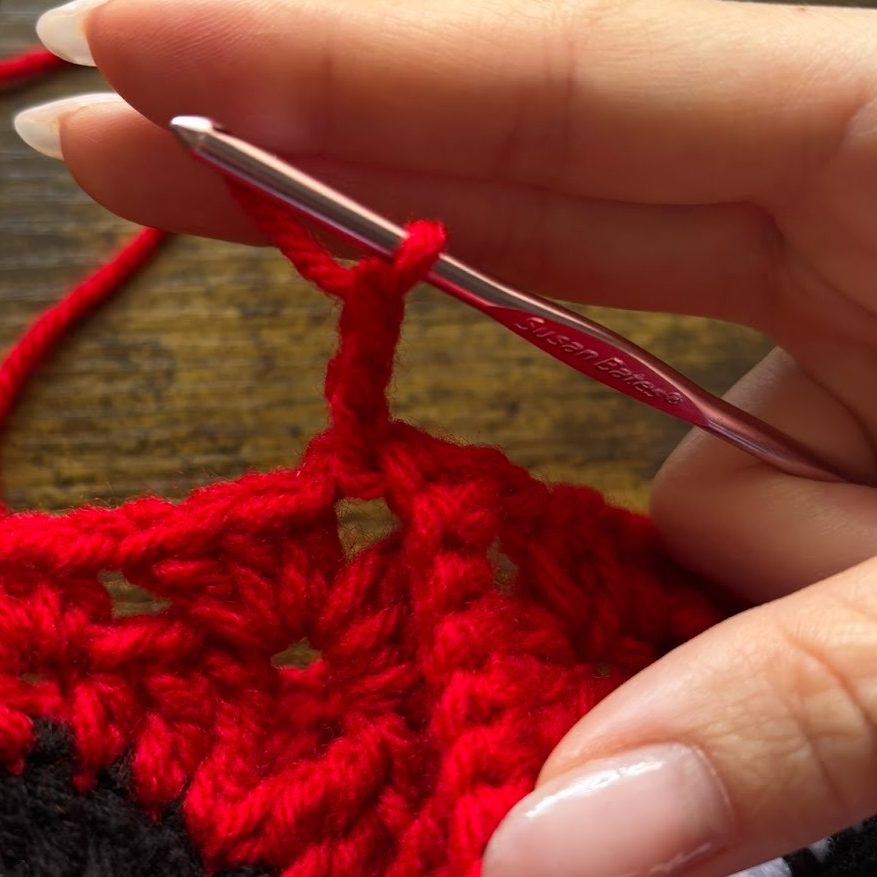
*Dc, hdc, ch1, hdc, sc, sc. ch1, skip a stitch, sc, sc, hdc, ch1, hdc, dc.^ Tr, ch2, tr in same stitch*.
Repeat ** 2 times, do *^ the last side. Slst into the 4th chain of the chain 6.
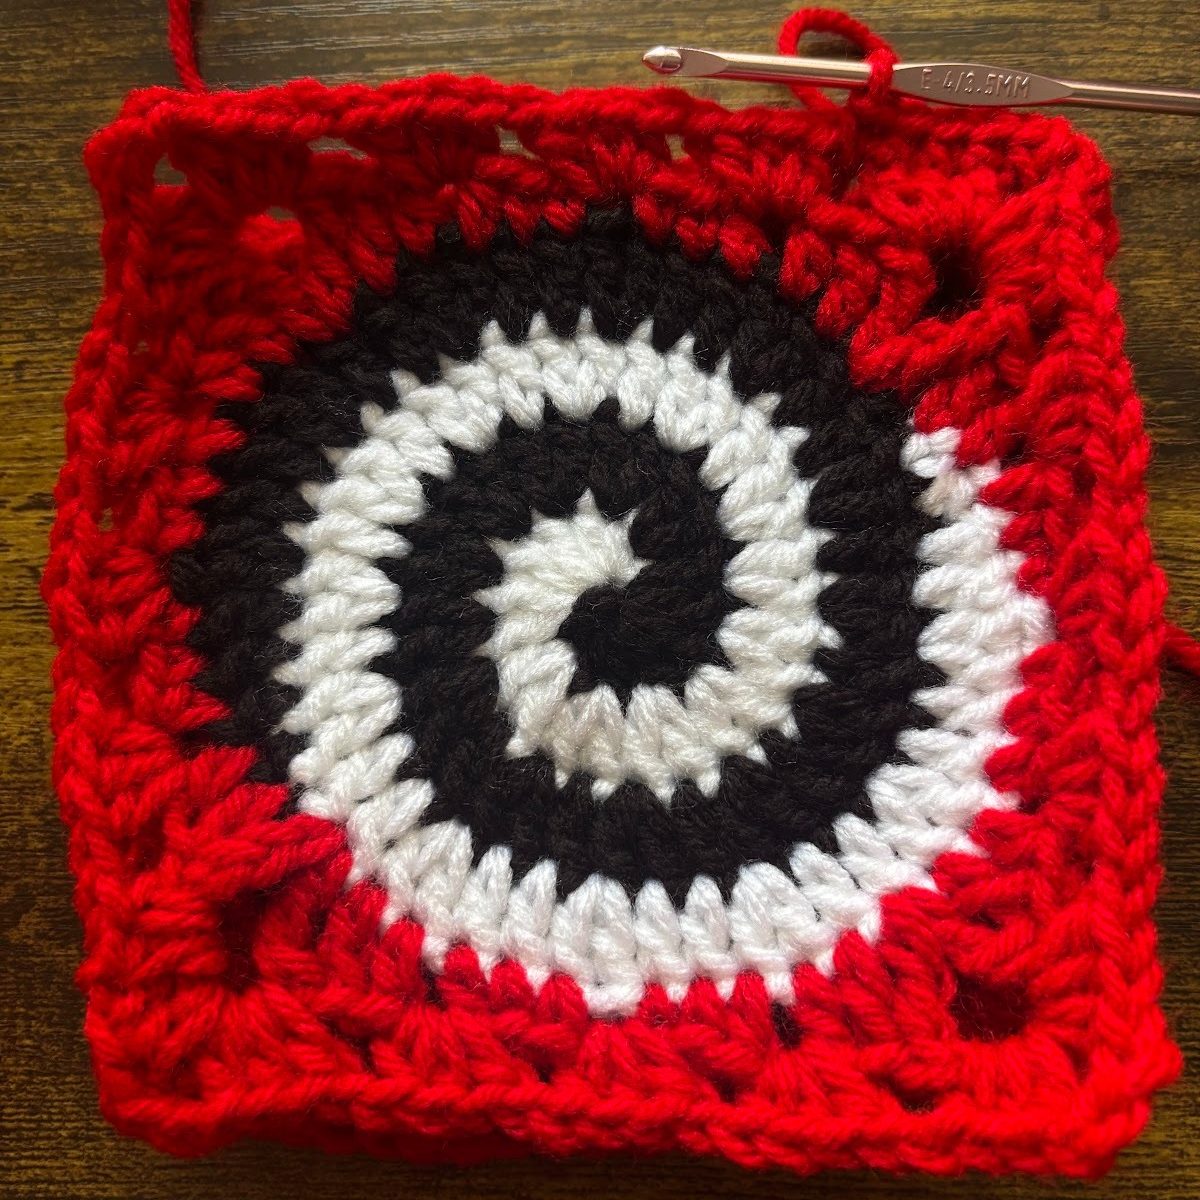
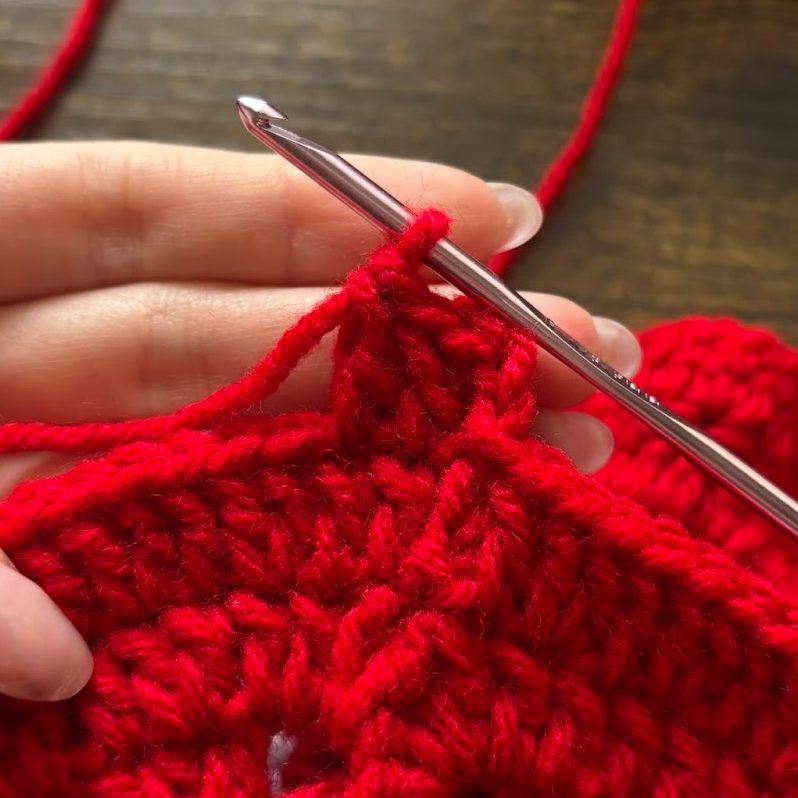
Making the square

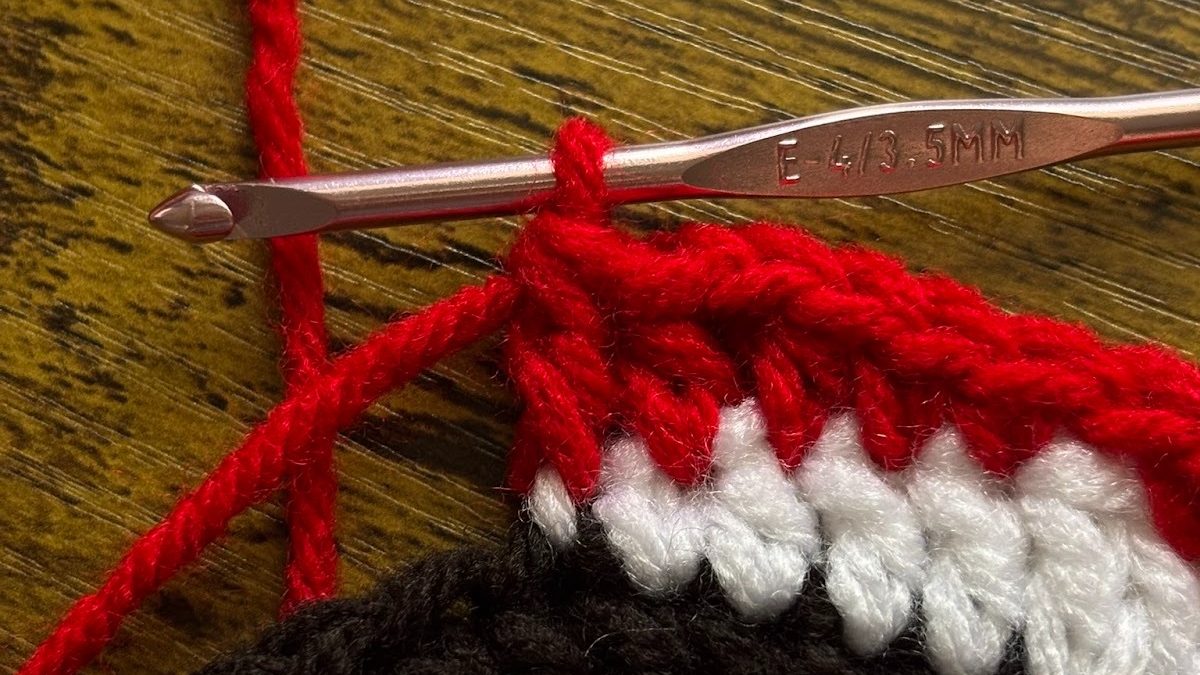
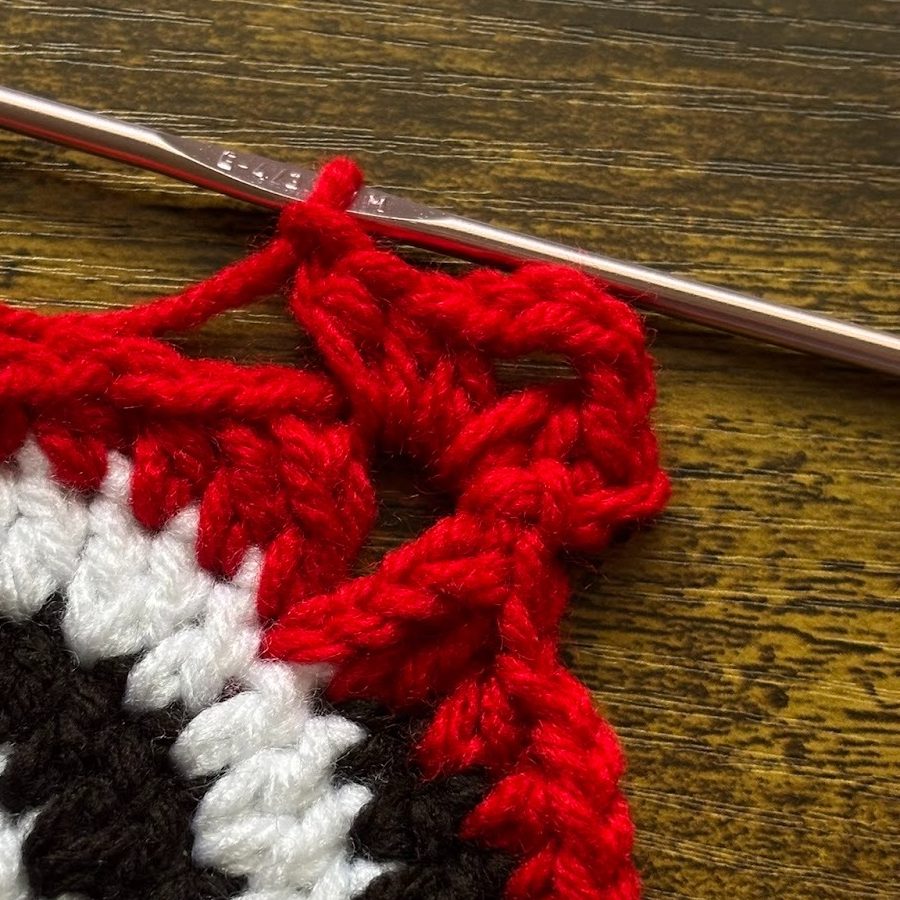
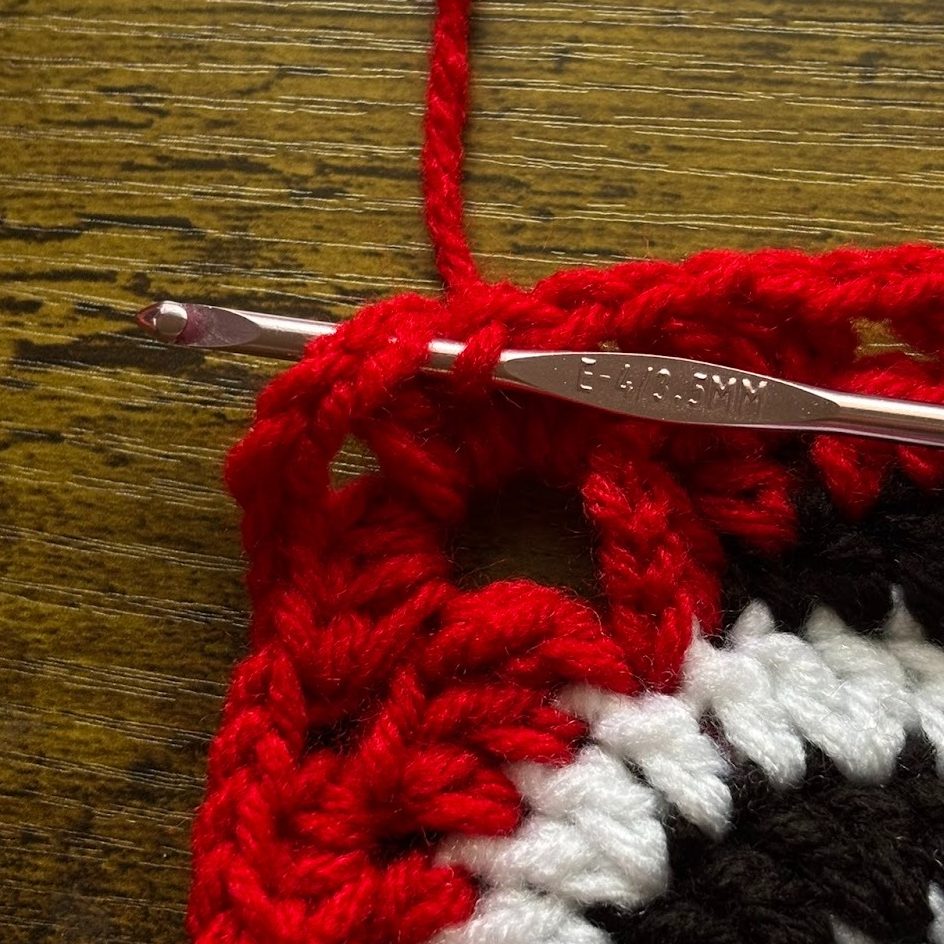
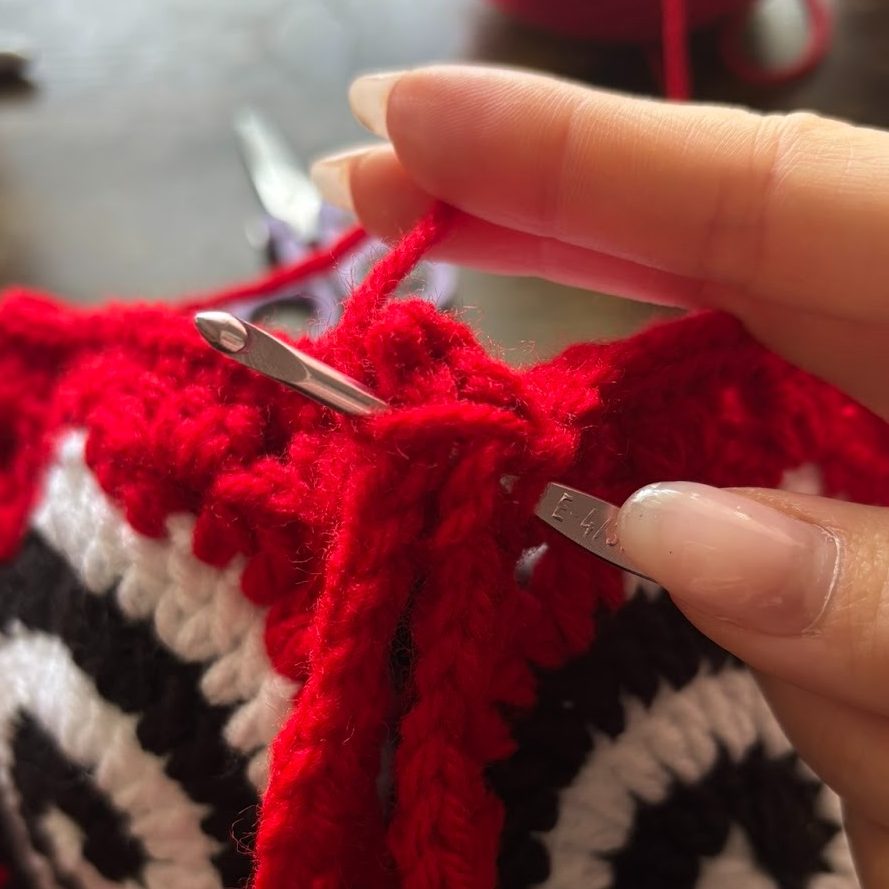
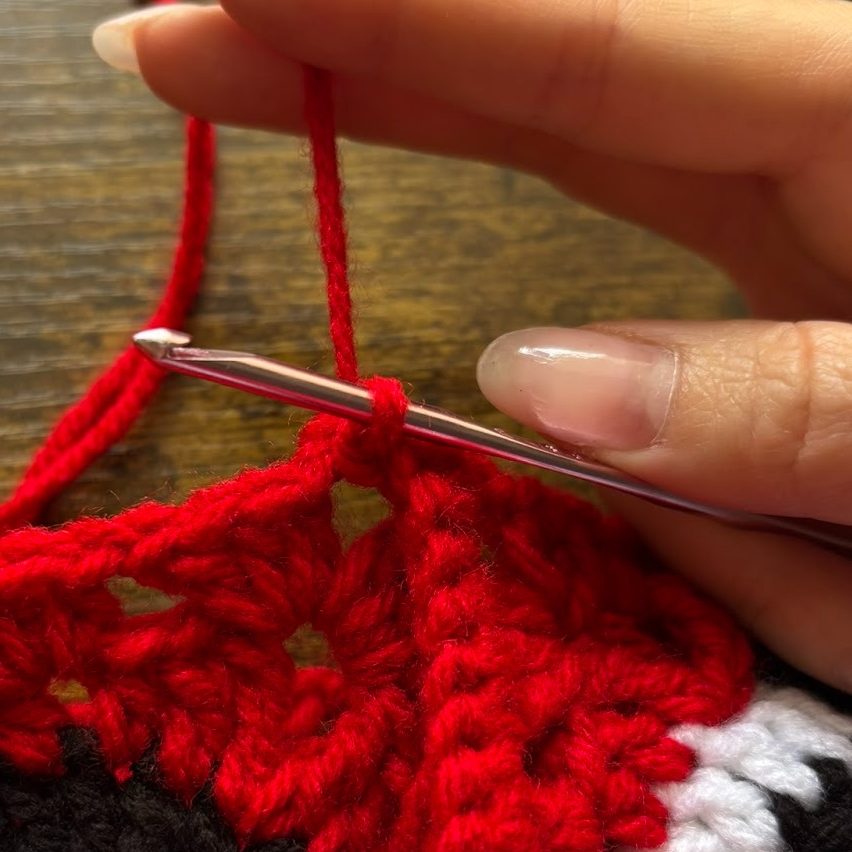
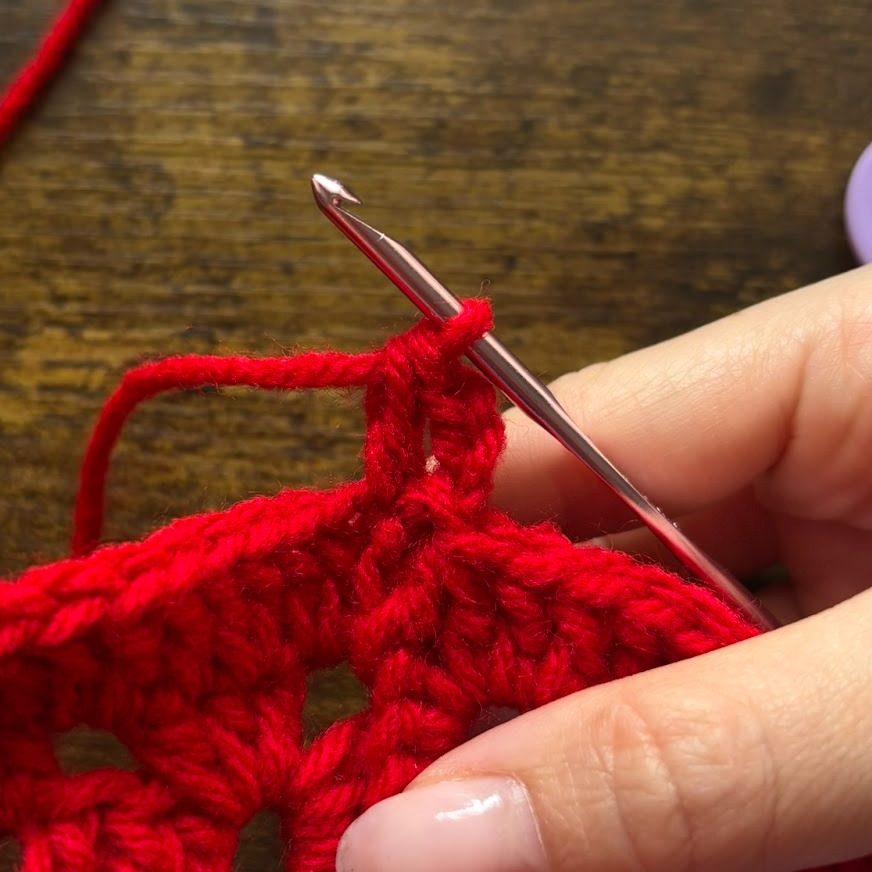
*** when you are making stitches into the slst, you may opt to make a st into either the slst itself OR into the st from the previous round. In this photo, I made my st into the slst. ***
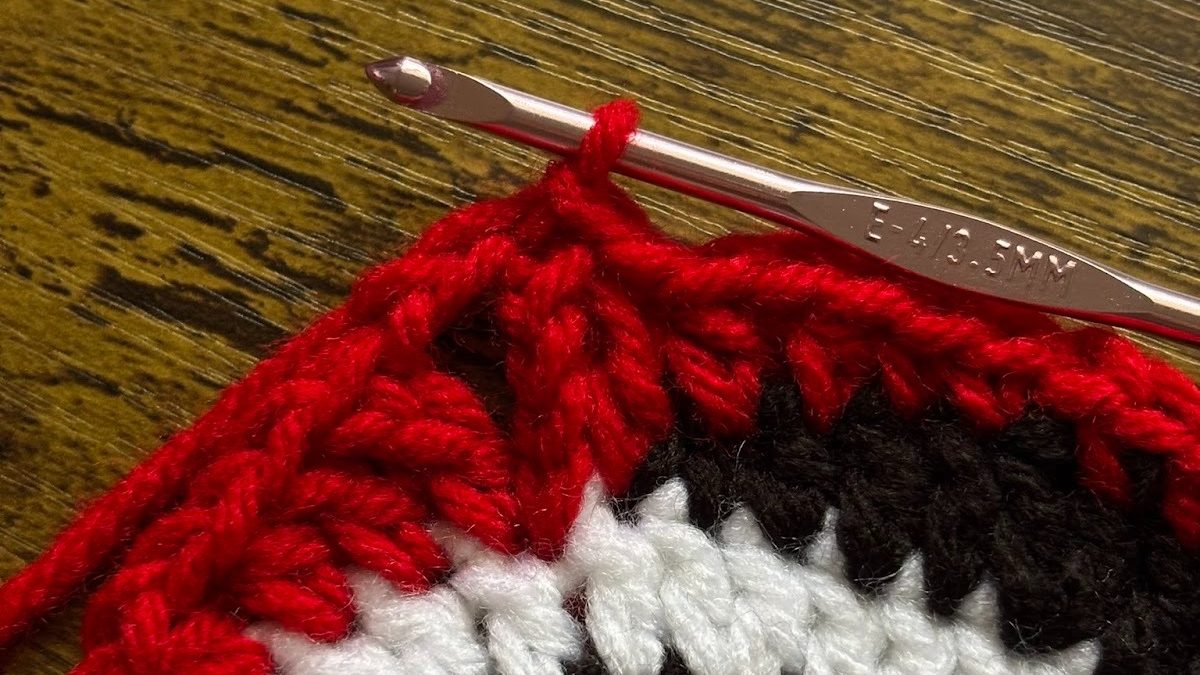
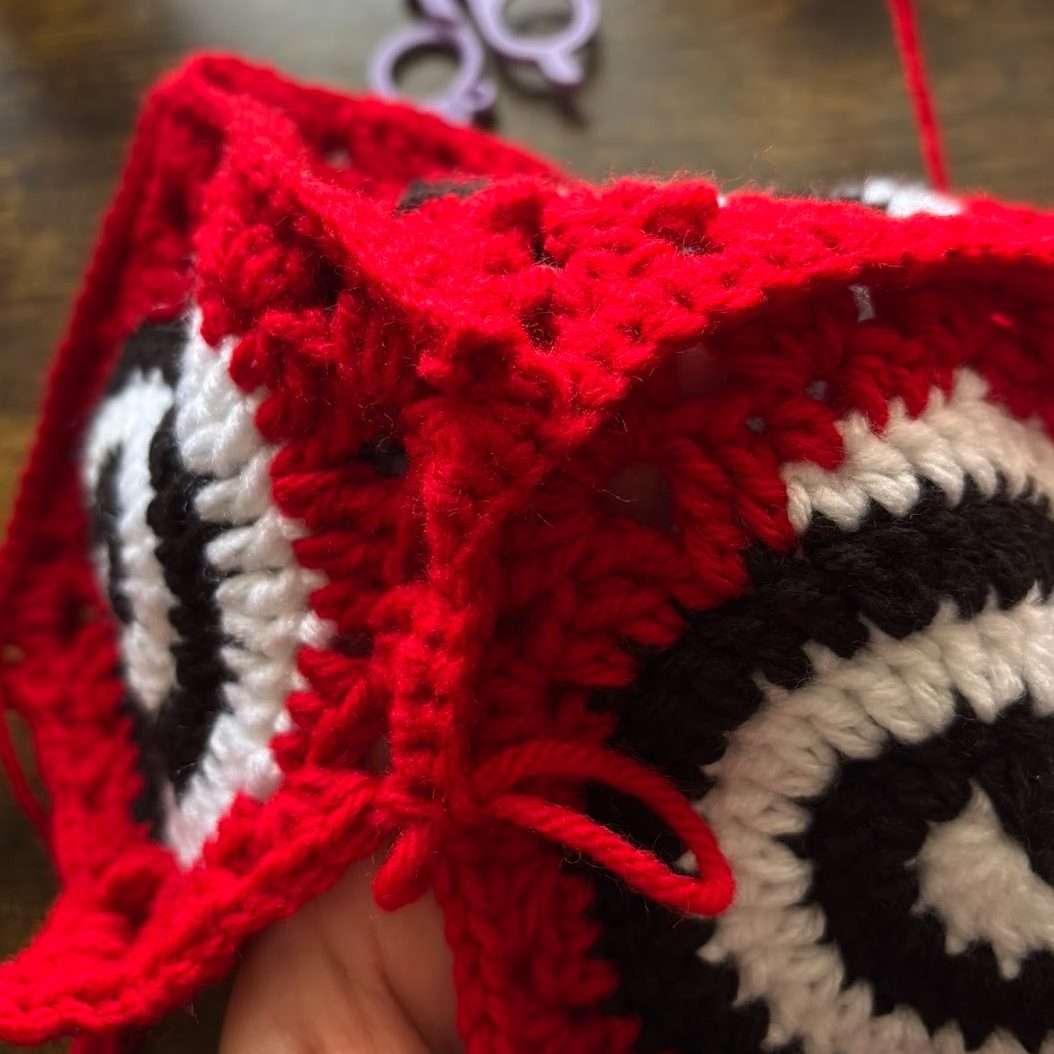
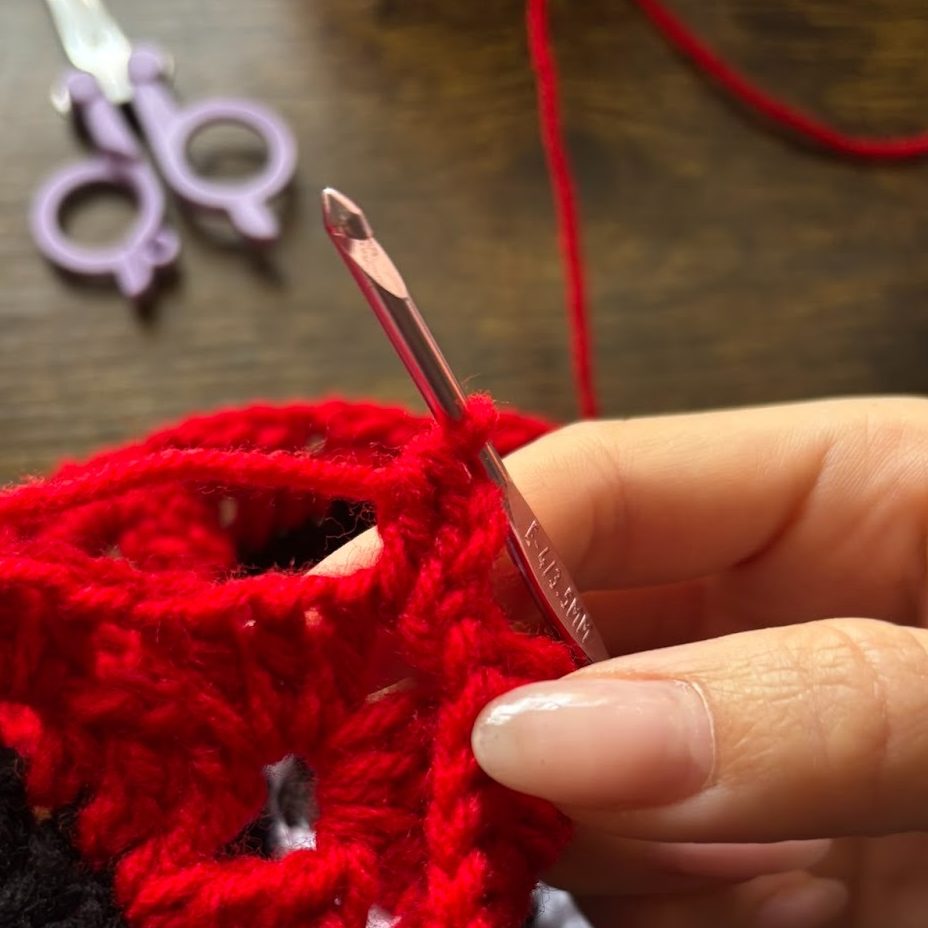
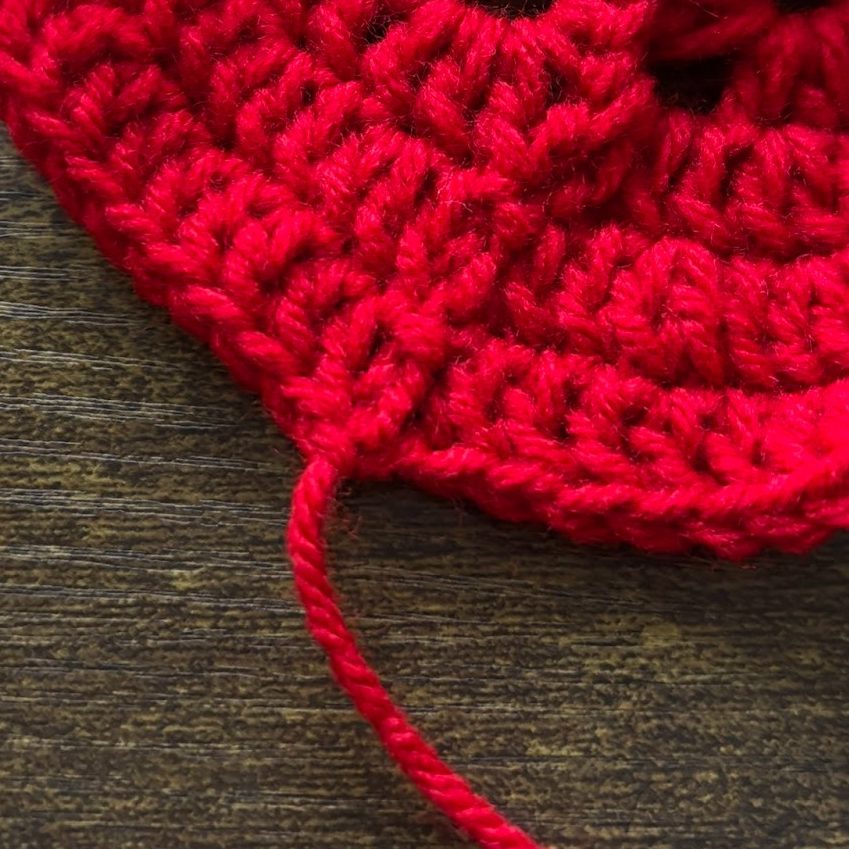
R2: Slst into the ch2 sp. ch 2 (does not count as a hdc). Hdc, ch3. Hdc 3 in the same ch2 sp, ch 1. Hdc 3 and ch1 in every ch1 sp of the previous row. Hdc3, ch3, hdc3 in every corner. After the last hdc3 and ch1, hdc2 in the beginning ch3 sp. slst into the first hdc of the round. FO
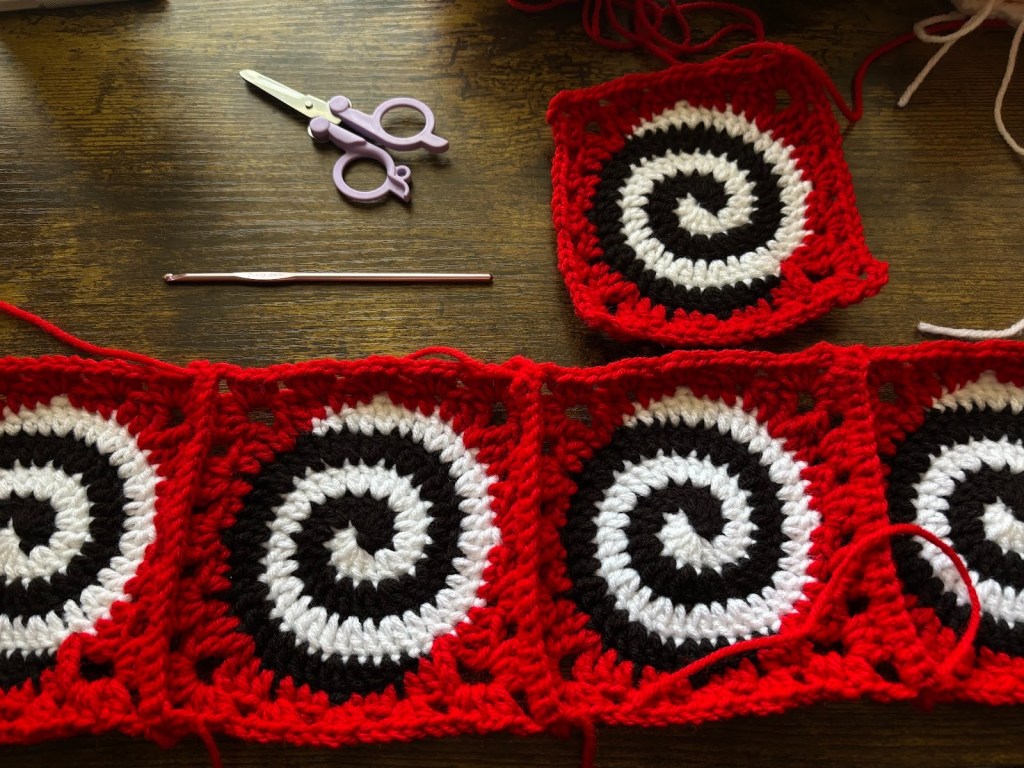
Joining the squares
You may find another way to use these squares in different color ways or textures. I’ll show you two ways to join- the first option being a simple sc across and the second being a mattress stitch. Personally, I like the sc across since it’s quick and it’s the easiest for me to do especially when I’m on the road, but the mattress stitch looks so smooth! If you ended up making the squares a bit large (if your hook, tension, yarn varied a little) then sc across might be good for you since it will take some width off the sides.
Option 1: sc across to join
This method will use a simple sc through two panels to join.This will create a seam that will stick out a bit when worn.
Insert your hook through two squares at the corners. Attach a slip knot in the yarn color of your choice. Ch 1 to secure.
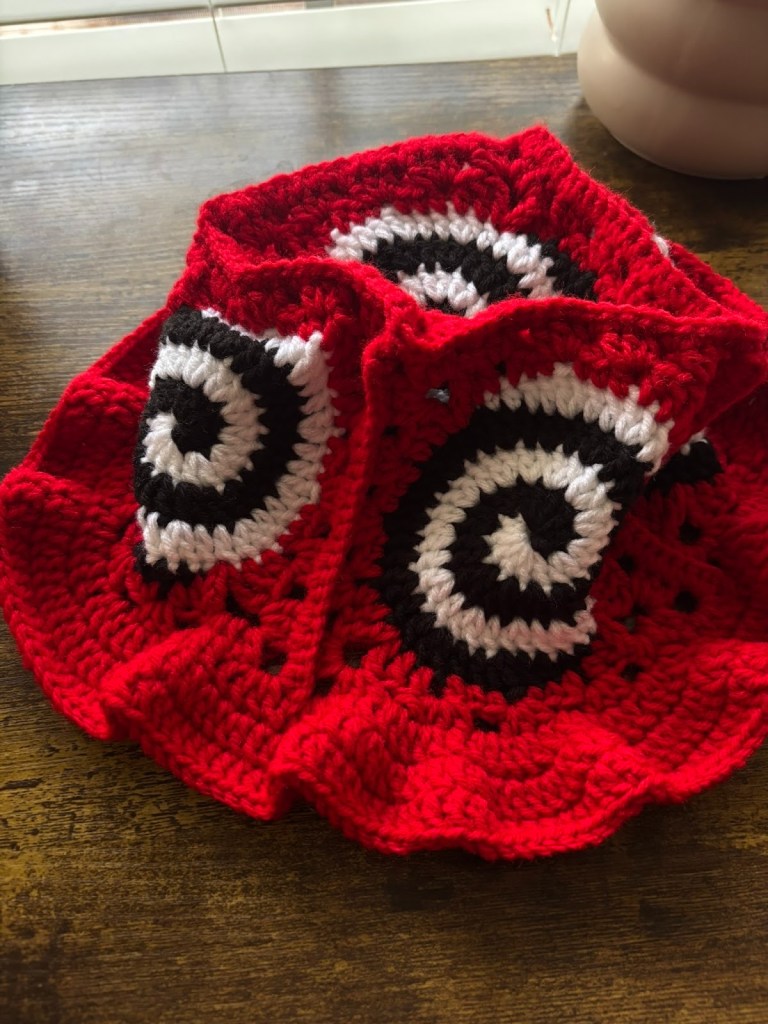
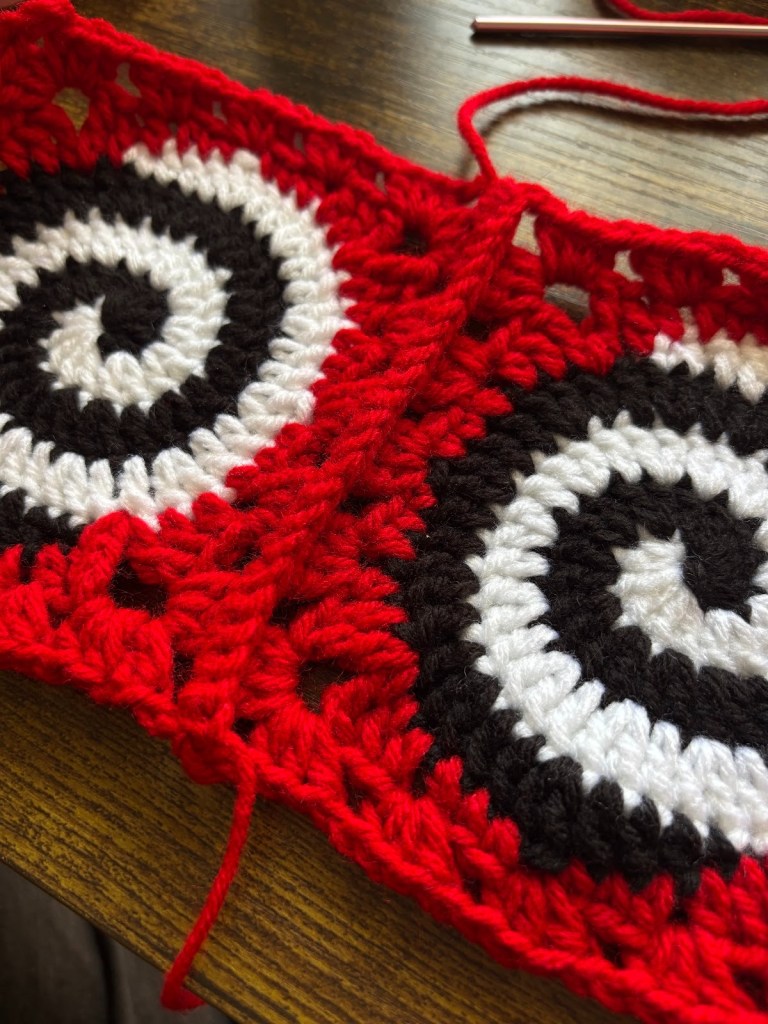
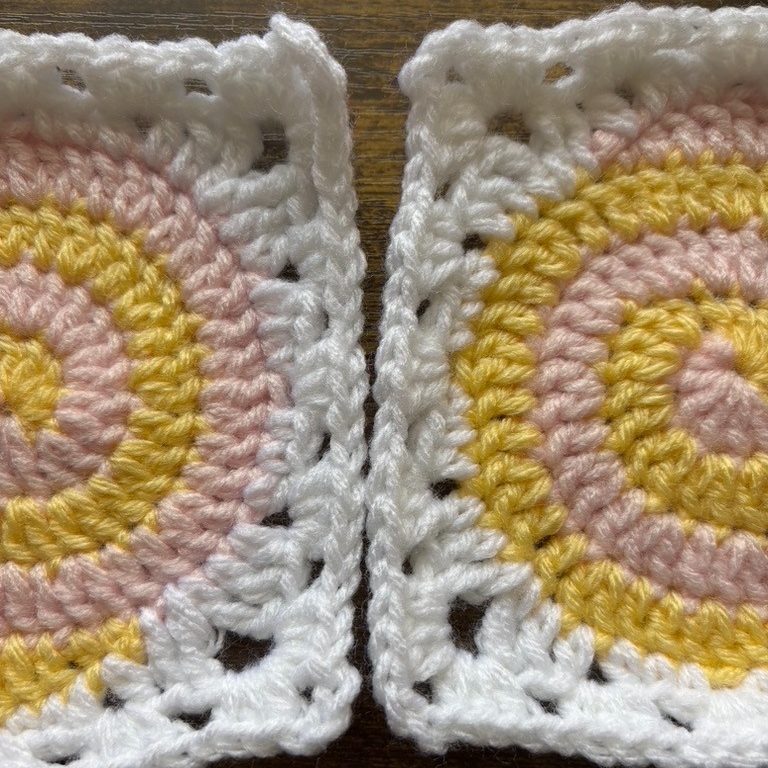
Make sure the backs of each square are facing each other so that when you open it back up, the right sides will face you. Also observe that the spirals also have an orientation. You may make the choice to align the spirals like I did in my example photo or allow them to be mixed up and different.
Line up the squares carefully. Each st should coincide with the st that mirrors it on the other panel. Sc 2 in the corner, then sc through each st, including spaces. Sc 2 in the other corner, then FO
Repeat until you have one panel left.
To attach this last panel, which will be the top, the panel will be attached on all sides along the top. Sc will continue along the remaining side, and at this point the hat will look like a spiral cube.
Insert your hook through two panels, ensuring the orientation is correct and to your liking. Sc 1 in the corner,
sc in each st across including spaces. In each corner, sc 1, sc2tog (one sc is on one panel, one sc is on the other panel and they will be joined as one sc), sc 1 in the next panel.
At the last corner before joining, sc 1, sc2tog one stitch each from the unconnected squares, turn your work so the remaining open side is facing you.
(sc in the two squares we were already working in)
(sc2tog one stitch each from the two unconnected squares, or we can refer to them as the left and right square)
Continue joining: Sc 2 in the corner sp. Sc in each st, including spaces. Sc 2 in the other corner sp.
Turn your work so the remaining exposed edge is facing you. It’ll look like you’re looking into a granny square cube with an open side.
Option 2: slip stitch join
Line up your squares. Count the stitches on each edge you’re joining to make sure they’re the same. If they’re not the same, you can just be sneaky and do two stitches in one, or use one stitch to cover multiple stitches in a similar way that a sc2tog is done 🙂
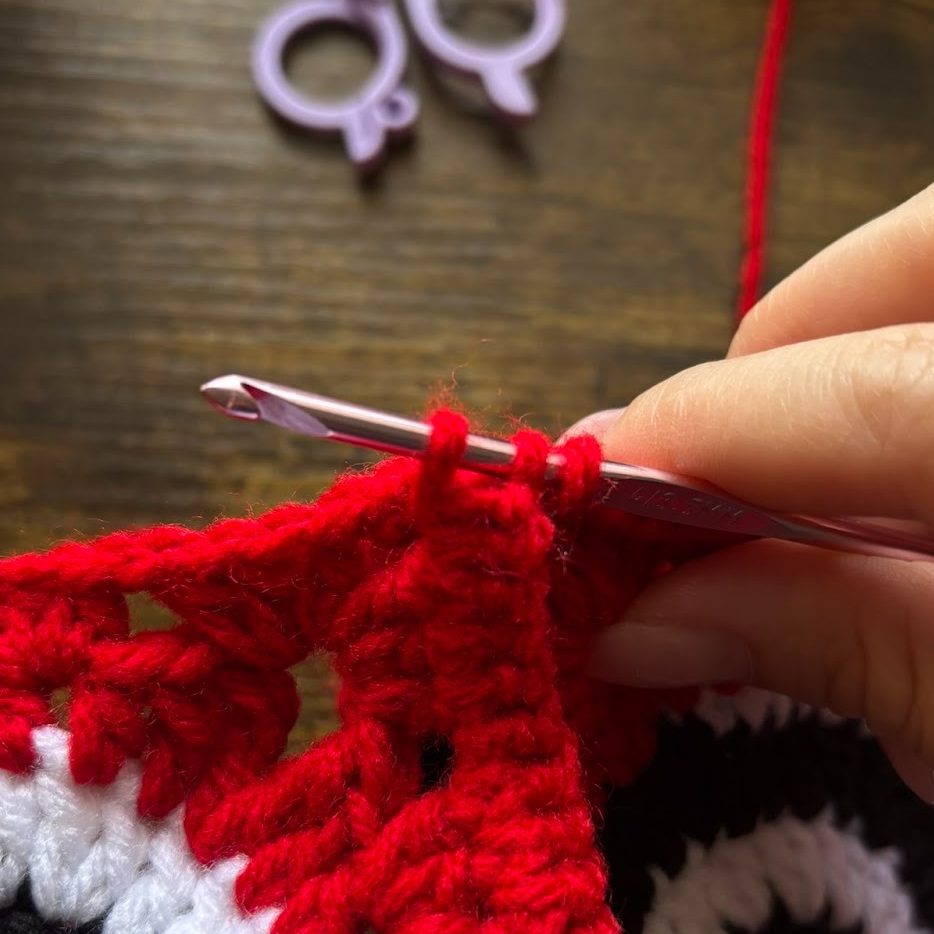
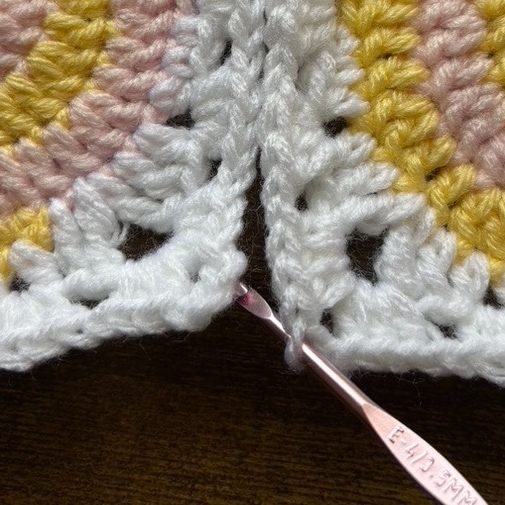
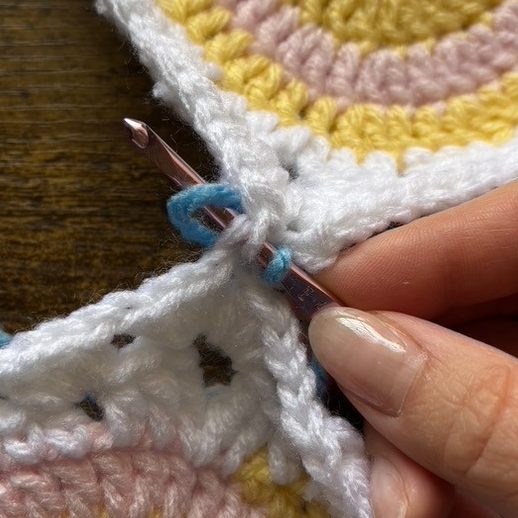
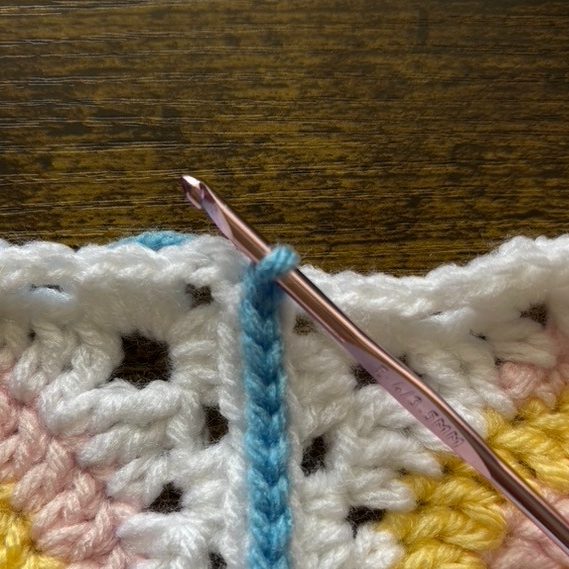
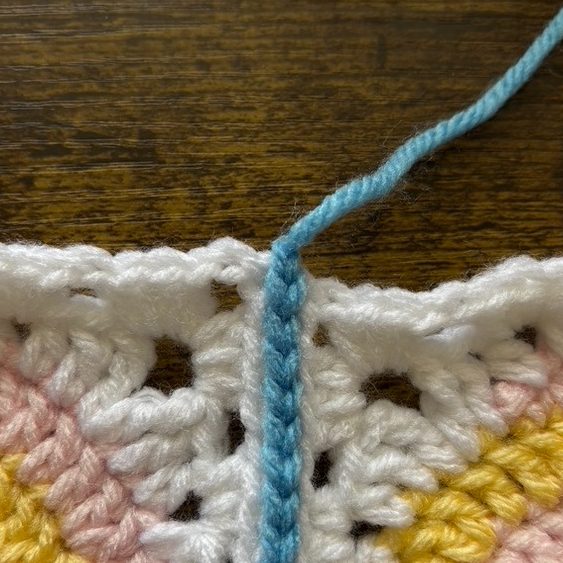
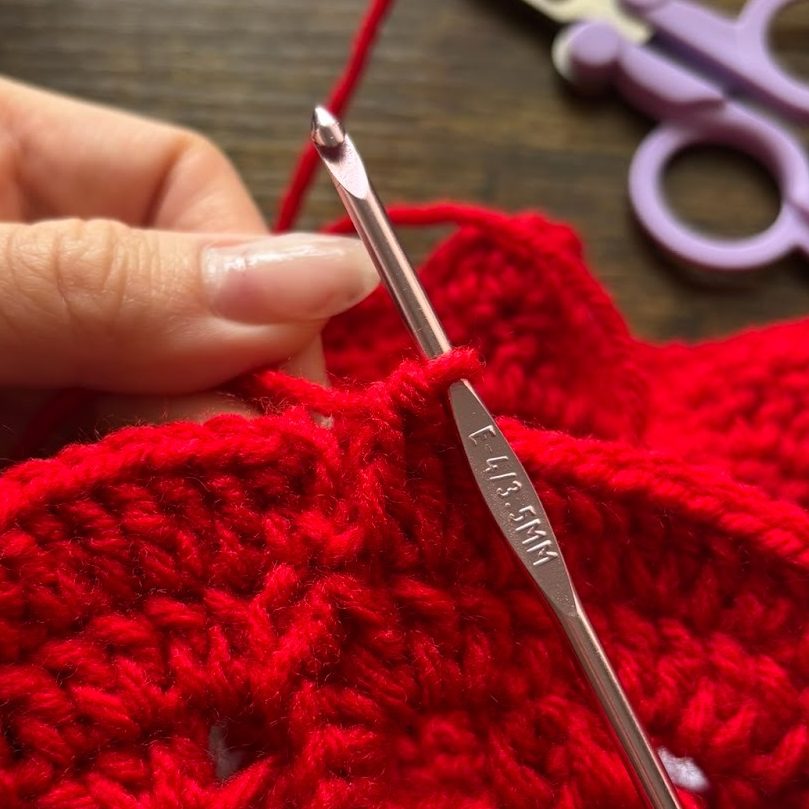
You see how the two rows of v’s kinda face up and nice and flat for us? If we pretend the line I drew is a point of reference for the center, you will be working in the loops that are closest to this midpoint. I will refer to them as “inside loops”
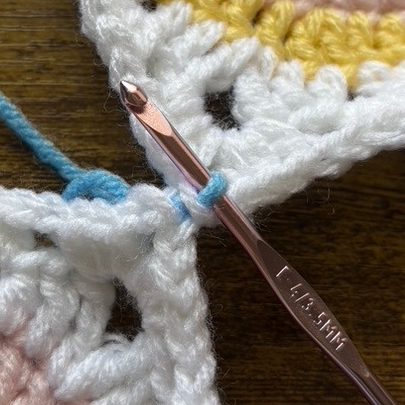
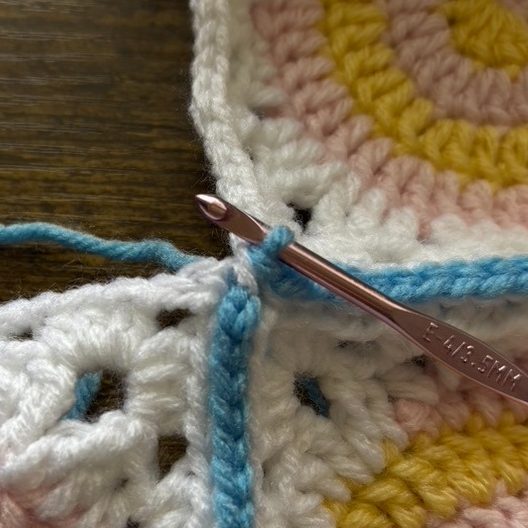
With your hook with nothing on it, insert through the inside loop of the right square. Still with an empty hook, insert through the inside loop of the left square
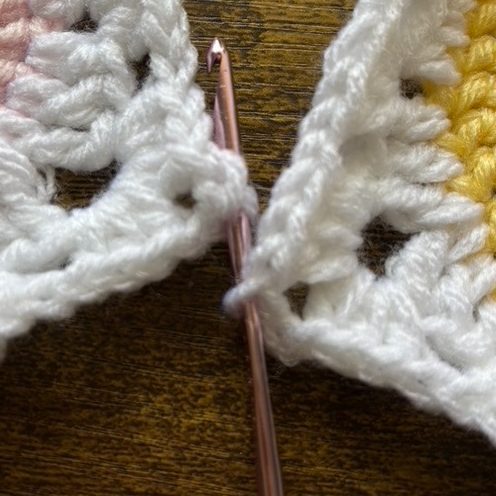
Create a slip knot with your joining yarn and attach it to the hook. Pull through both loops.
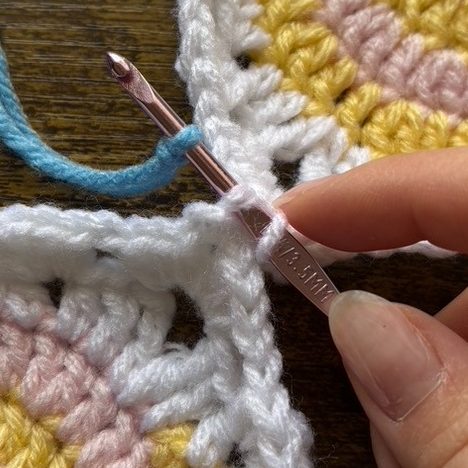
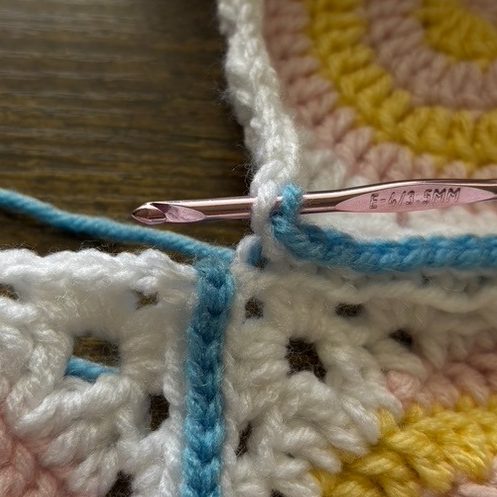
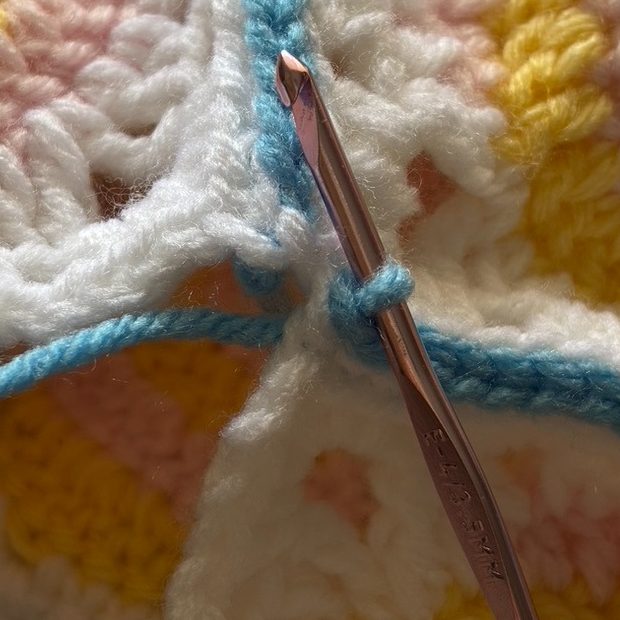
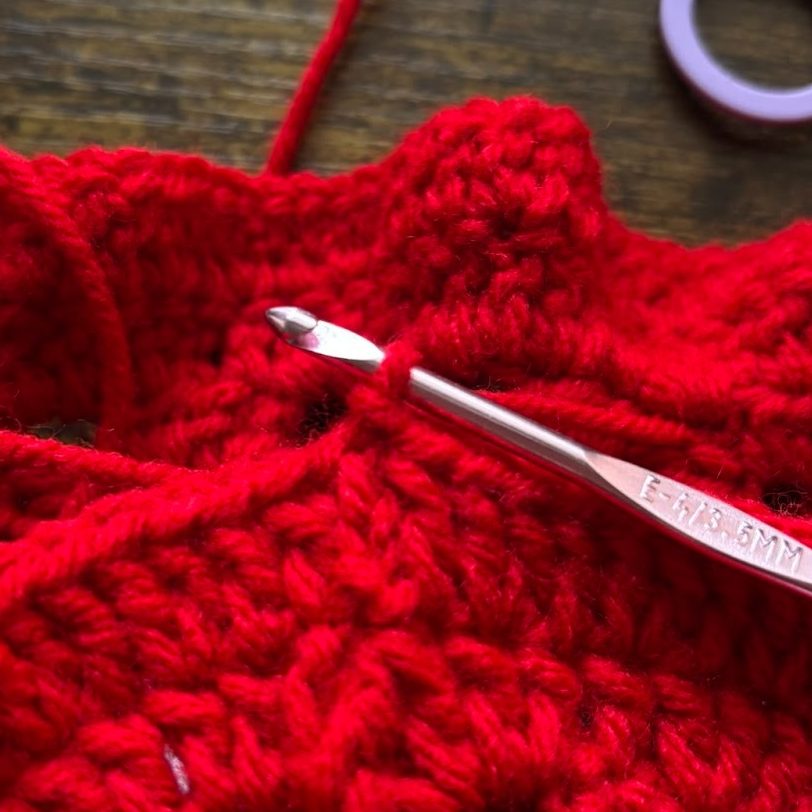
Insert your hook through the inside loop of the right square. Insert your hook through the inside loop of the left square. YO and pull through both loops.
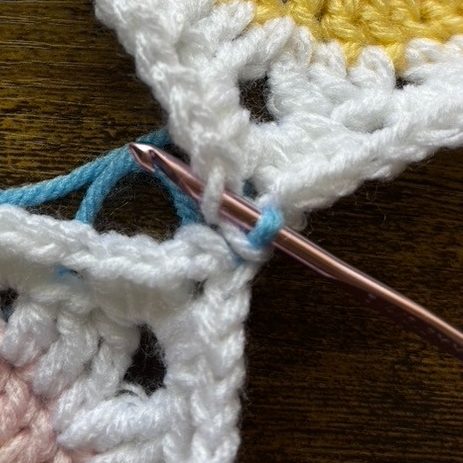
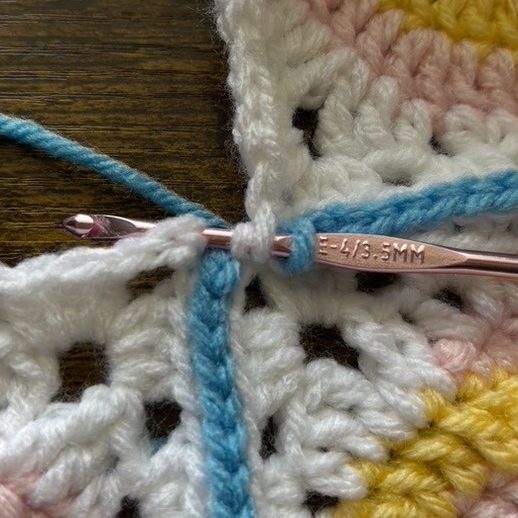
Now two slip stitches have been completed. Repeat until and including the 2nd chain of the corners. This means will work 2 of 3 loops, so that there is another slst join in the 2nd loop after you join the top granny square.
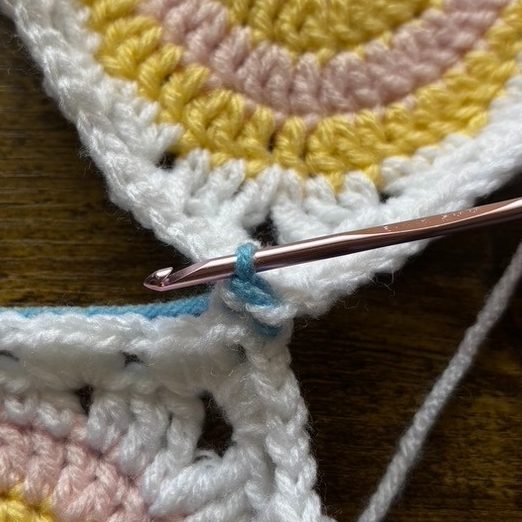
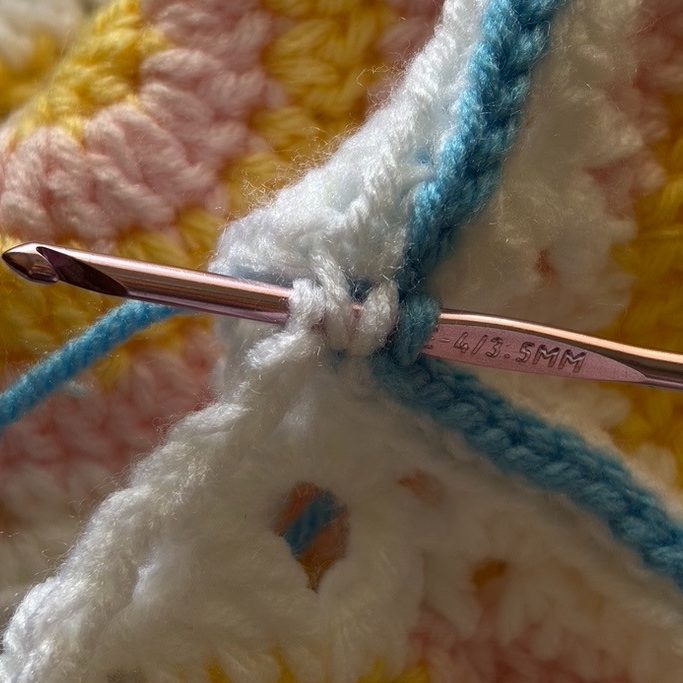
After the last slst join, FO. Repeat until 4 total squares have been joined. I usually weave in the tails later, so I just leave them as is.
The last granny square will be joined the same way as the regular sc join.
In the corner chains, do a slst join, followed by a slst join (top right square, bottom right square, bottom left square, pull through all three loops), slst join.
In the last corner before the final edge, slst join, slst join (top right square, top left square, bottom right square), slst join.
Continue slst join down the last edge.
After the last slst join, FO.
Creating the brim
At this point we will work on the edging and determine how much ruffling you’d like.
I will usually make my hat brim 3 dc rows in a pattern of [dc inc, dc], [dc inc, dc], [dc] (dc increase for two rows and then dc in each st for the last row) but you may experiment with what you like. Perhaps if you want more ruffling you might opt for dc inc in every stitch all the way around. If you want less ruffle, you can add a dc inc less frequently or even just do a dc in every st all the way around for all 3 rows. It’s up to you!
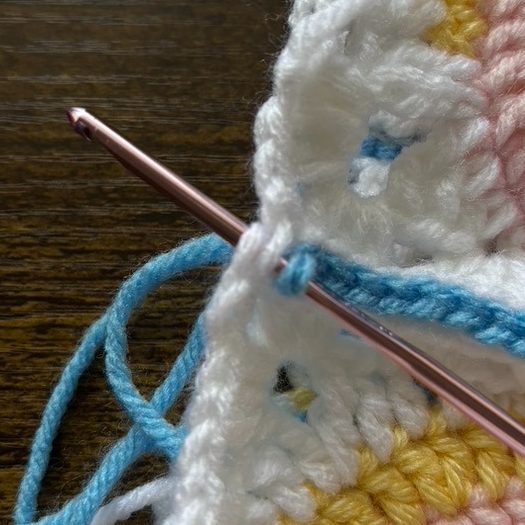
Slst into the corner. Ch3 (does not count as a st. helps minimize gaps since this area will stretch)
Dc 1 in the same corner.
Starting in the first stitch of the 3dc, repeat (dc, dc inc) in every st and sp.
Two options for the corners, depending on your dc and dc inc placements:
If your last st (last st of the 3 dc) was 1 dc:
- Dc 2 in the first corner. Dc2tog starting in the first corner and ending in the second one. Dc 2 in the second corner. Continue as usual
If your slst st (last st of the 3dc) was dc inc,
- Dc 1 in the first corner. Dc2tog starting in the first corner and ending in the second one. Dc 1 in the second corner. Continue as usual
In the last corner, dc 1 or 2 (depending on your last st) and dc2tog across the corners. Slst into the first dc of the round.
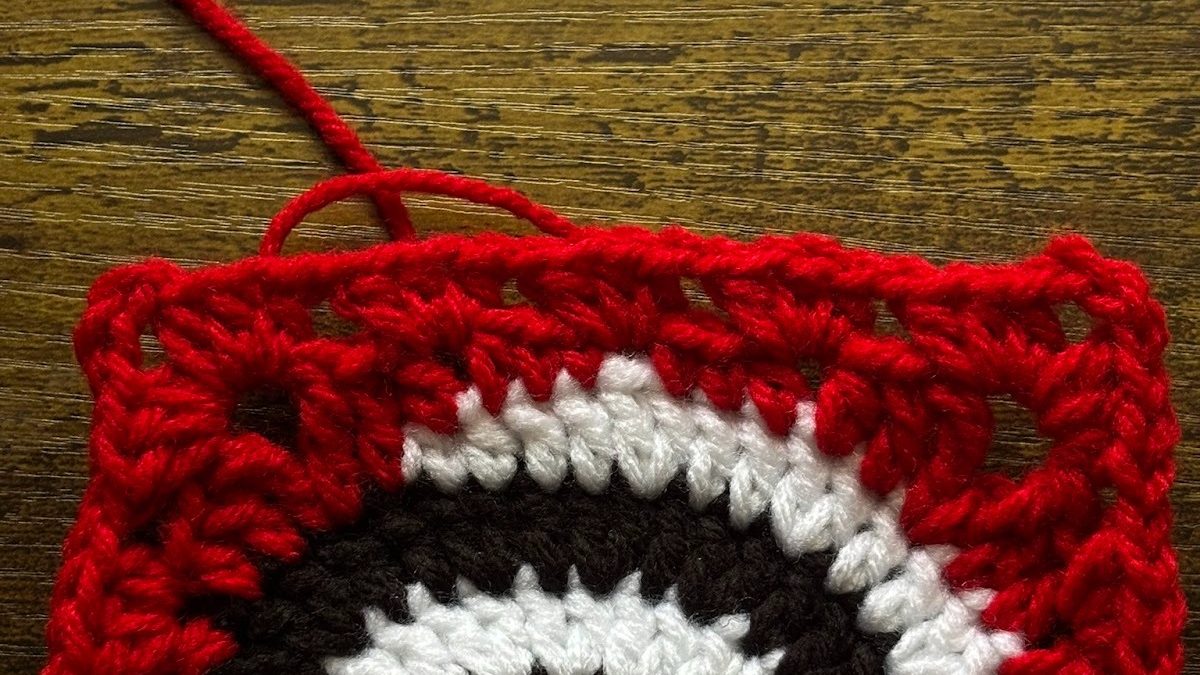
R2: ch 3 (does not count as a st). Dc in the same sp as the ch3.
Dc, dc inc all the way around. Slst into the first dc.
R3: ch3 (does not count as a st). Dc in the same sp as the ch3. Dc in each st all the way around. Slst into the first dc. FO.
All done! I don’t really bother to block hats since it’ll just fit right over my head, but feel free to do whatever you usually do to your work before wearing!